Dynamic Colour Changing Skydome: From Blender to a Horizon World
This guide walks you through creating a low-poly skydome in Blender, optimising it and exporting it as an .fbx file ready for Horizon Worlds. Then connecting the skydome to code, to create a dynamic colour changing effect.
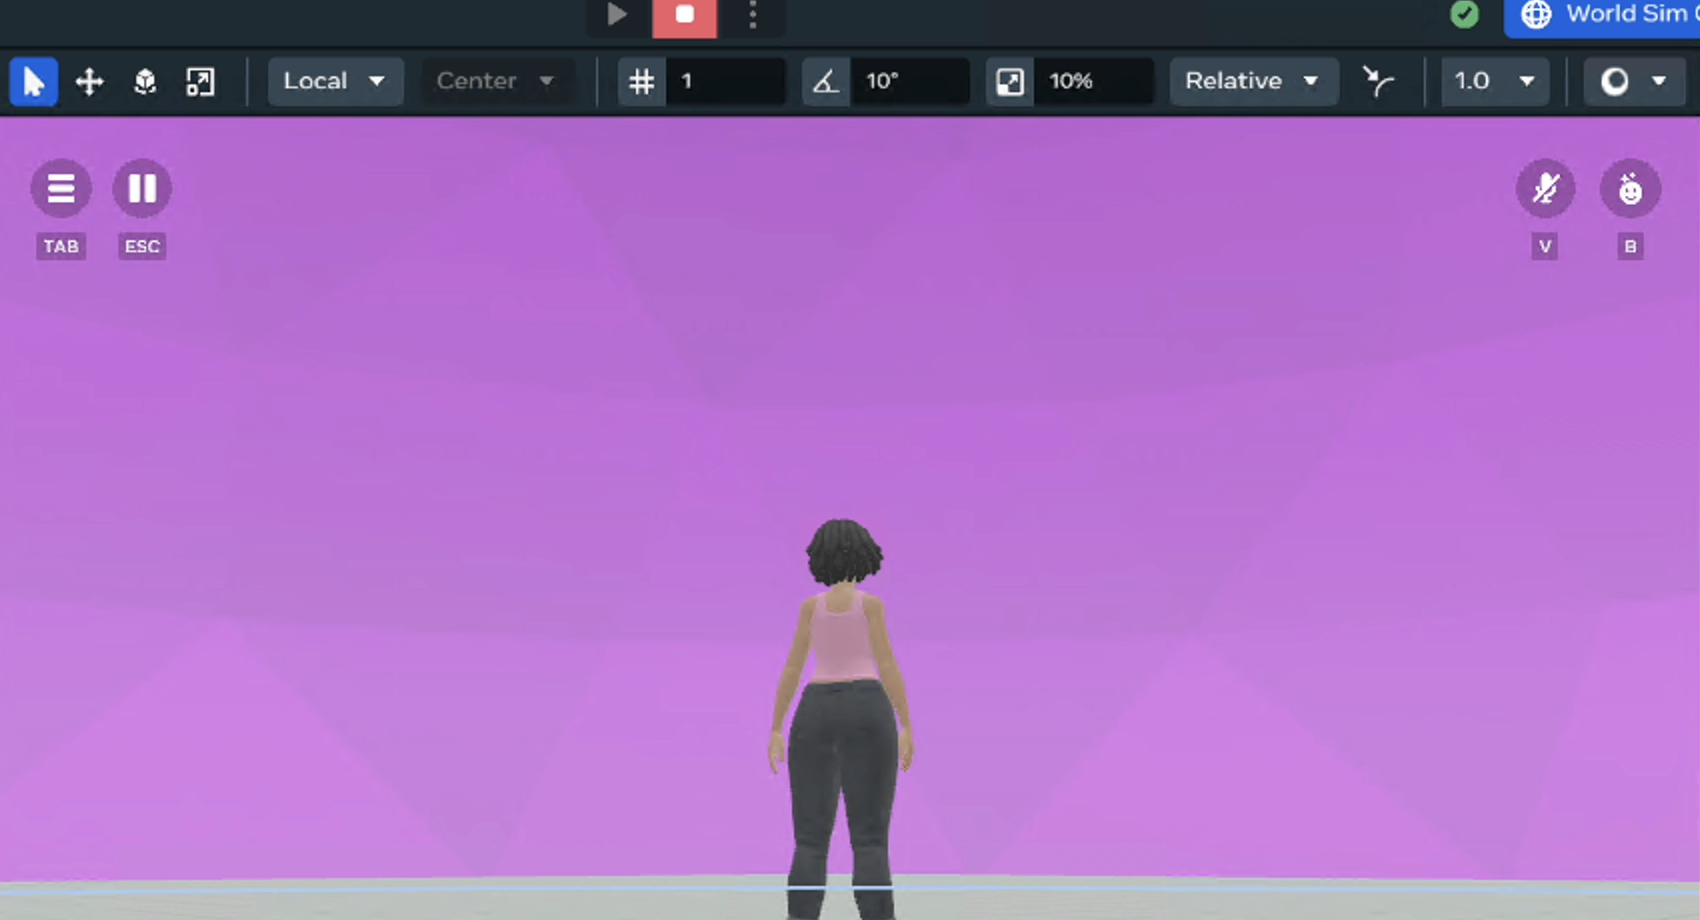
Demo
Here’s a quick preview of the result in action:
Prepare Low-Poly Skydome in Blender
Step 1: Prepare Blender
- Download Blender (latest version 4.5). If you don’t already have it installed.
-
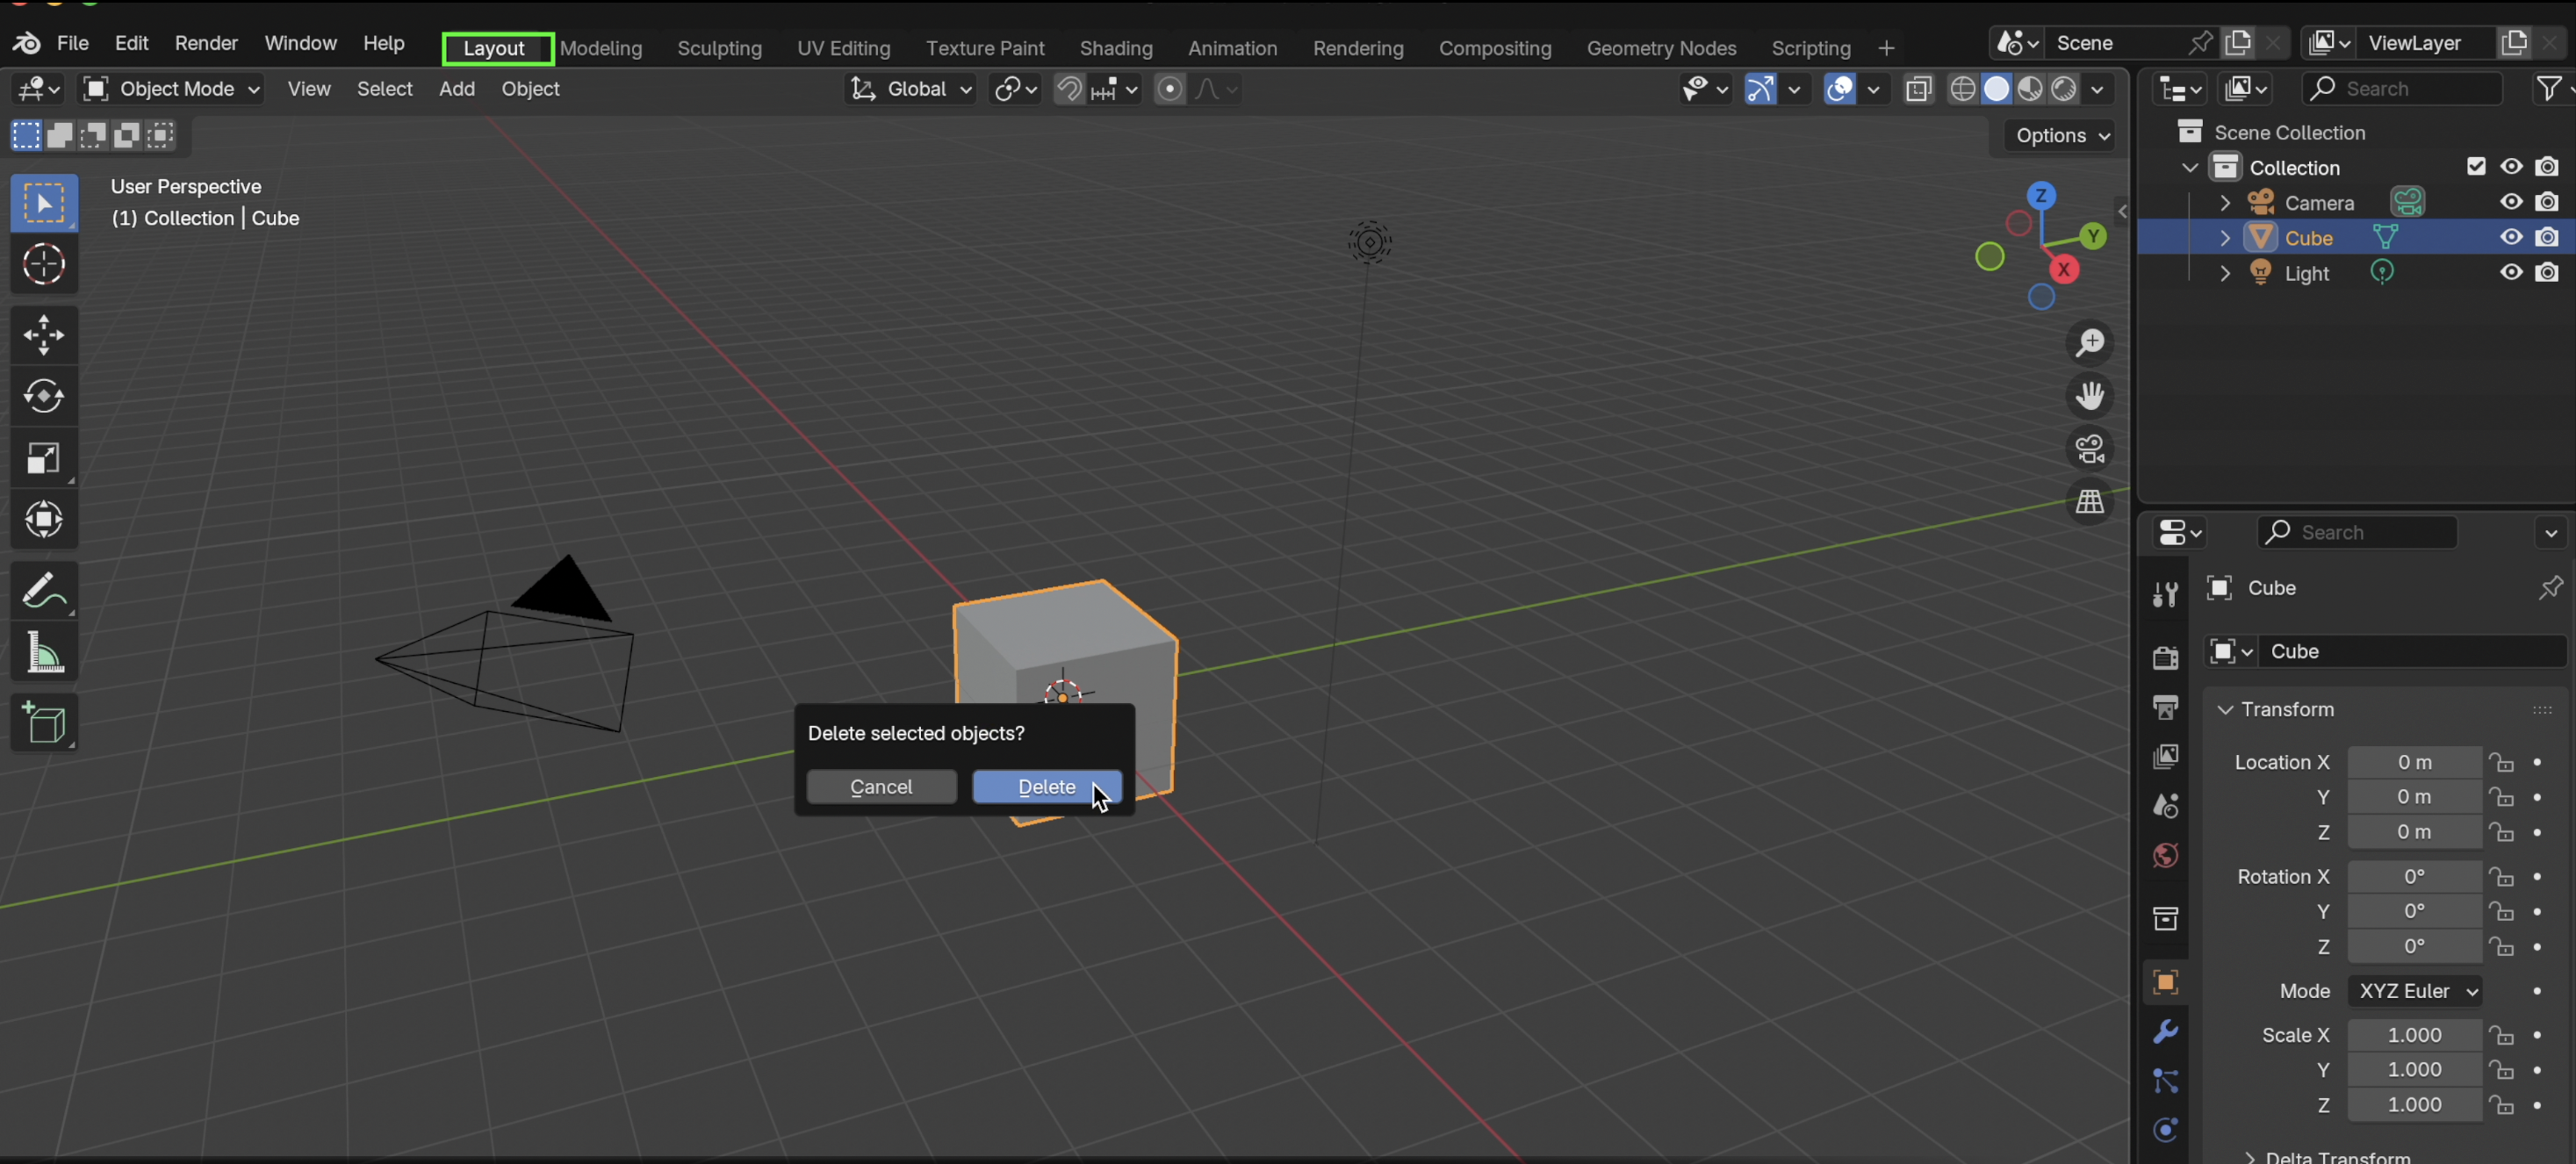
Switch to Layout Workspace for easy modelling, if you are not already in the workspace.
-
Open Blender → Delete default cube (
X→ Delete).
Step 2: Add a Sphere for the Skydome

-
Shift + A→ Mesh → UV Sphere. -
In the bottom-left panel (or press
F9):- Segments: 32 (can reduce later for performance).
- Rings: 16.
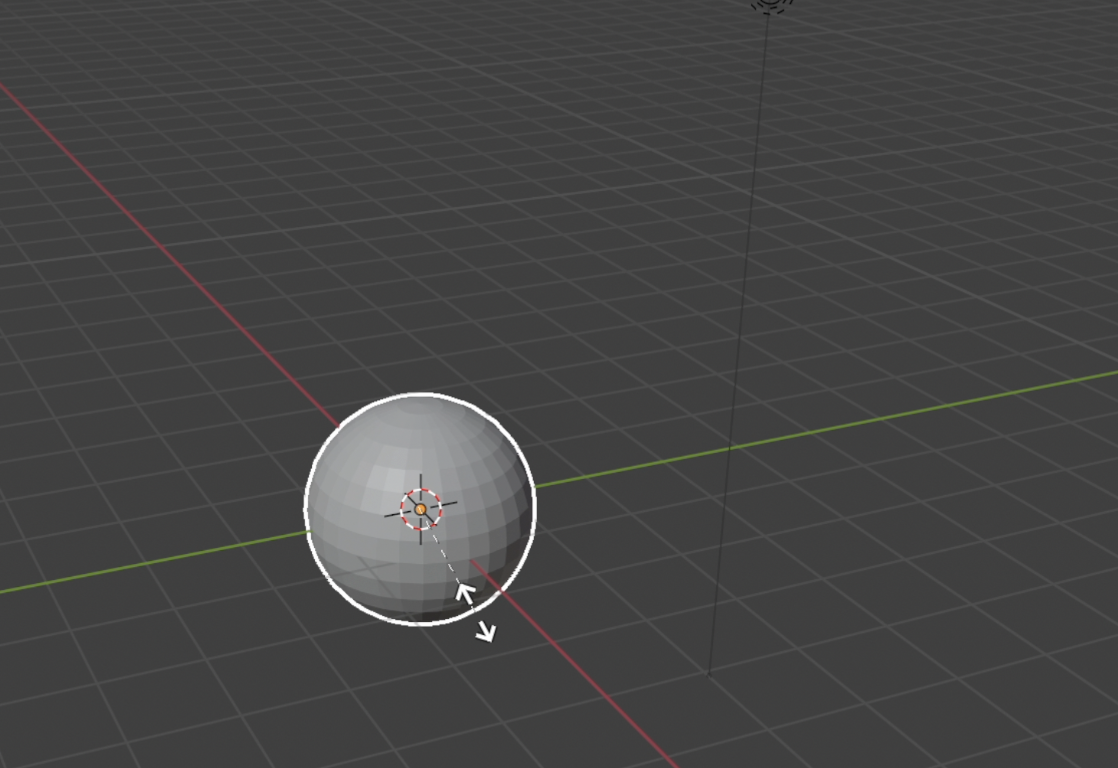
- Scale up:
S→ type50→Enter(or larger as needed).

- Flip Normals:
- Press Tab. Go to Edit Mode

- Select All (
A). Alt + N→ Flip.
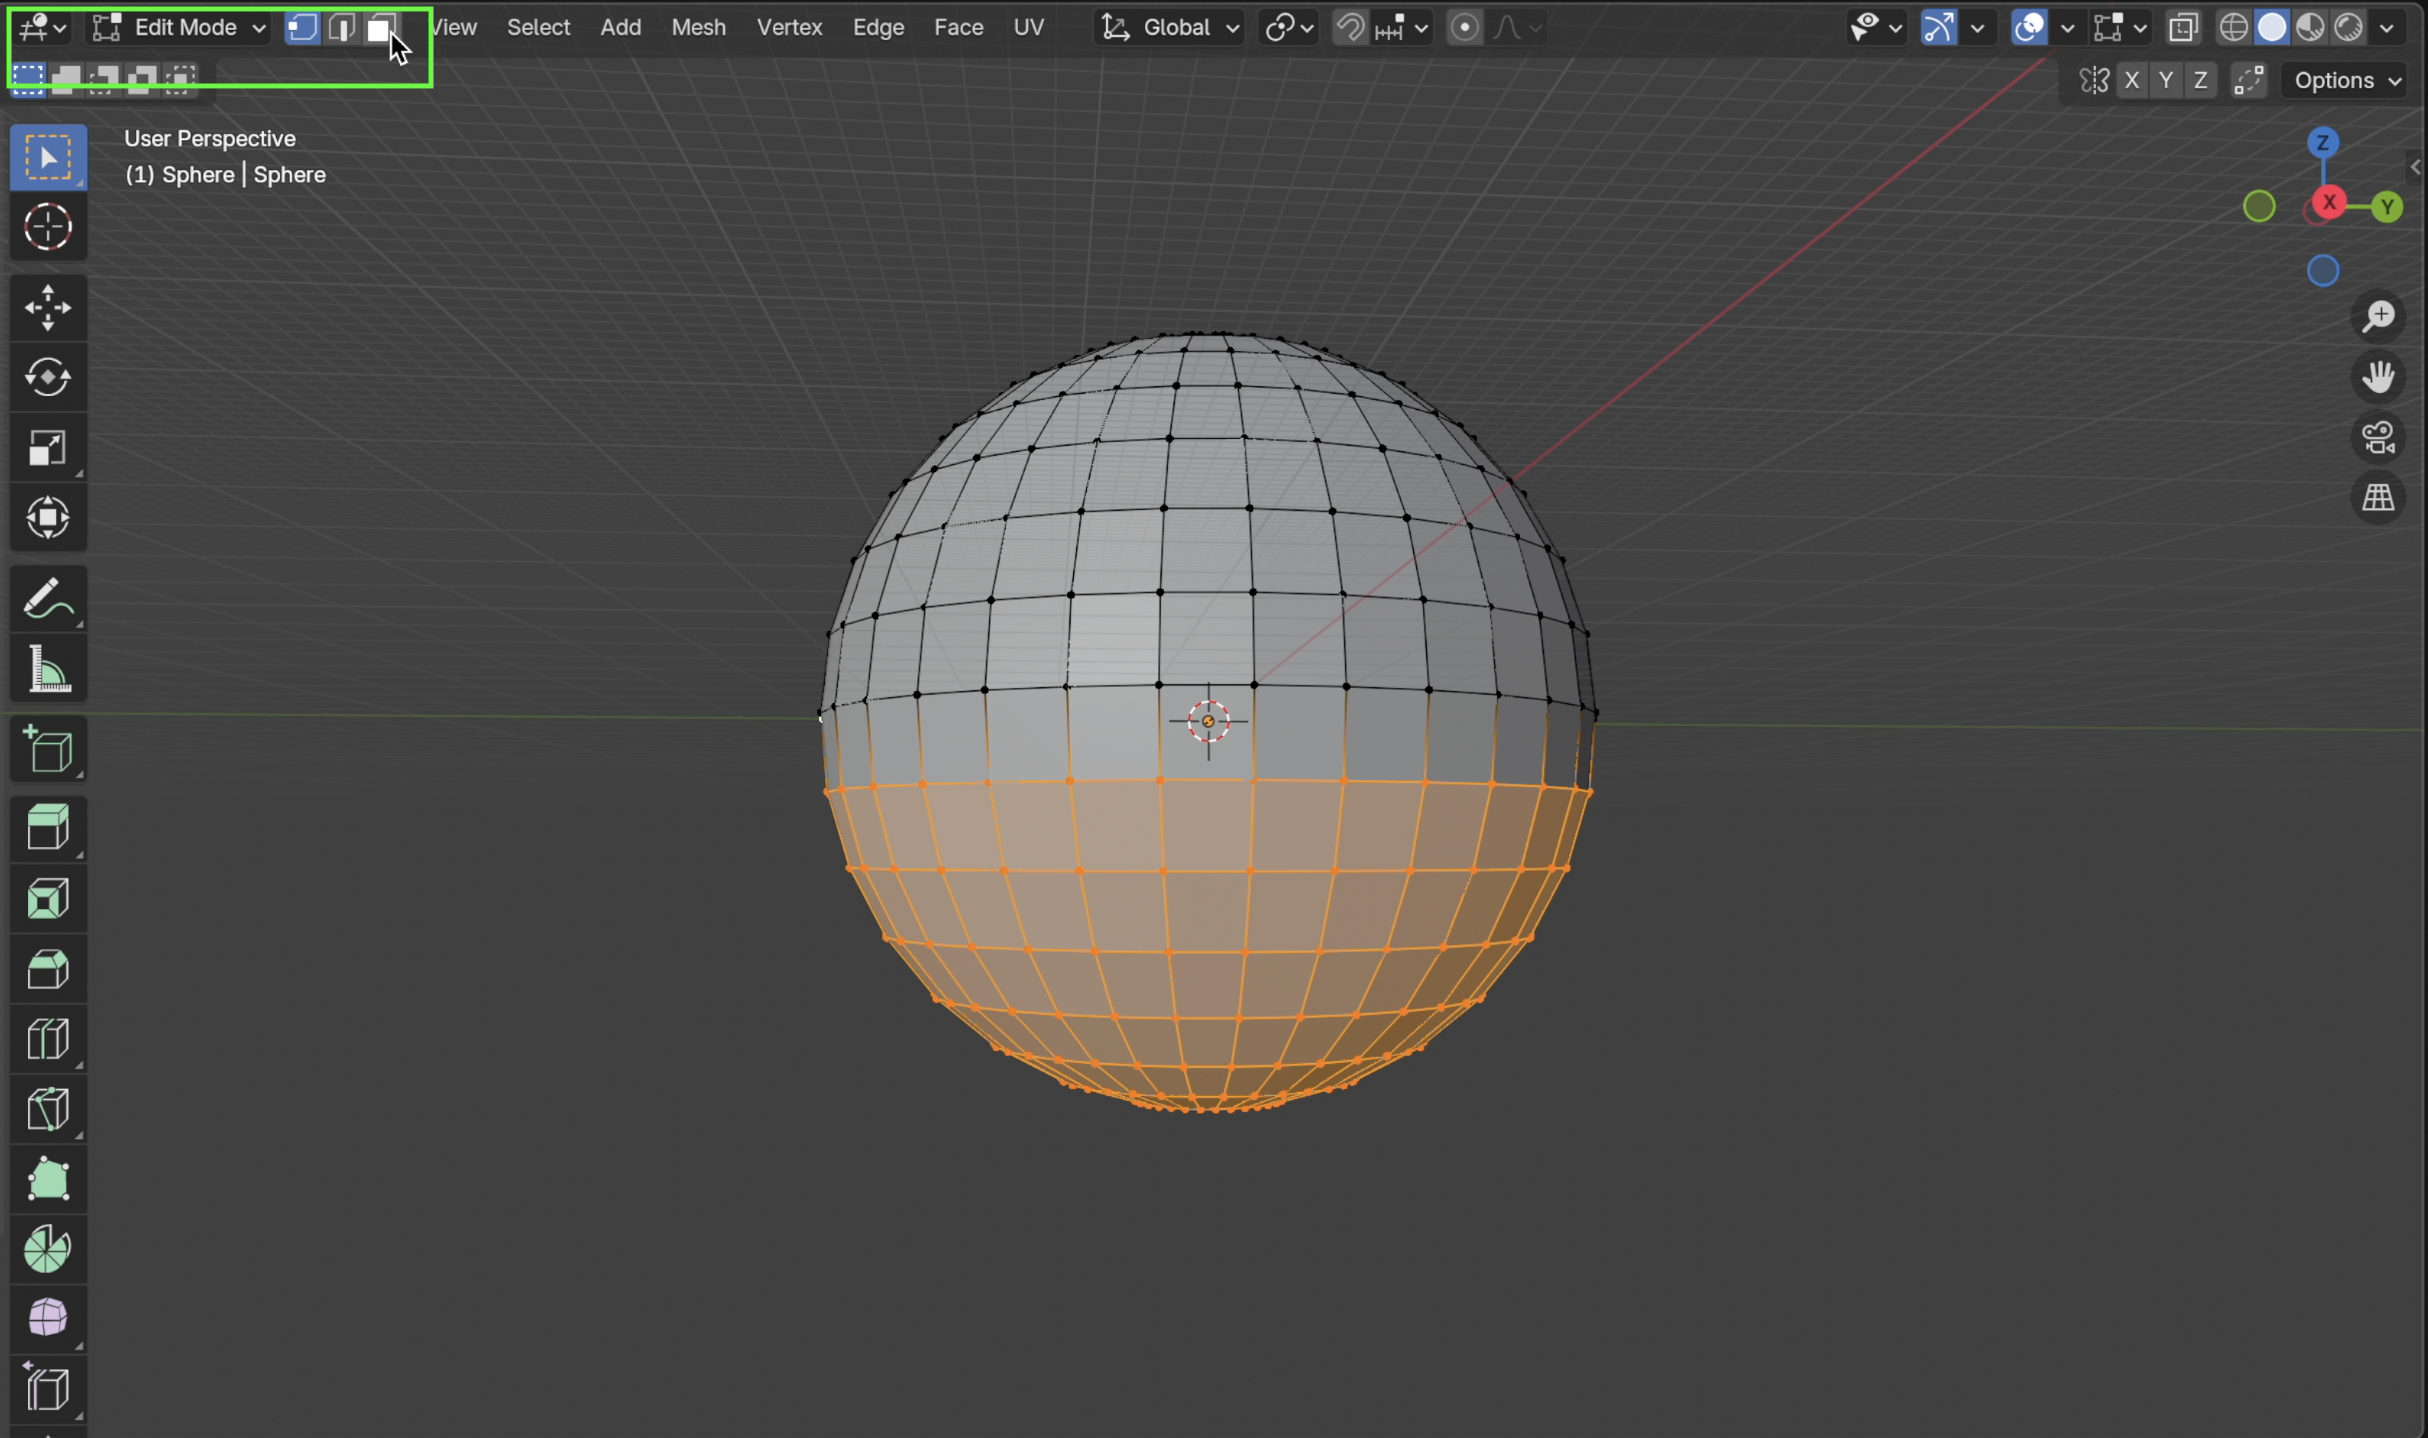
Step 3: Convert Sphere to a Dome
-
In Edit Mode, enable Face Select.
-
Select the bottom half (box select or circle select).
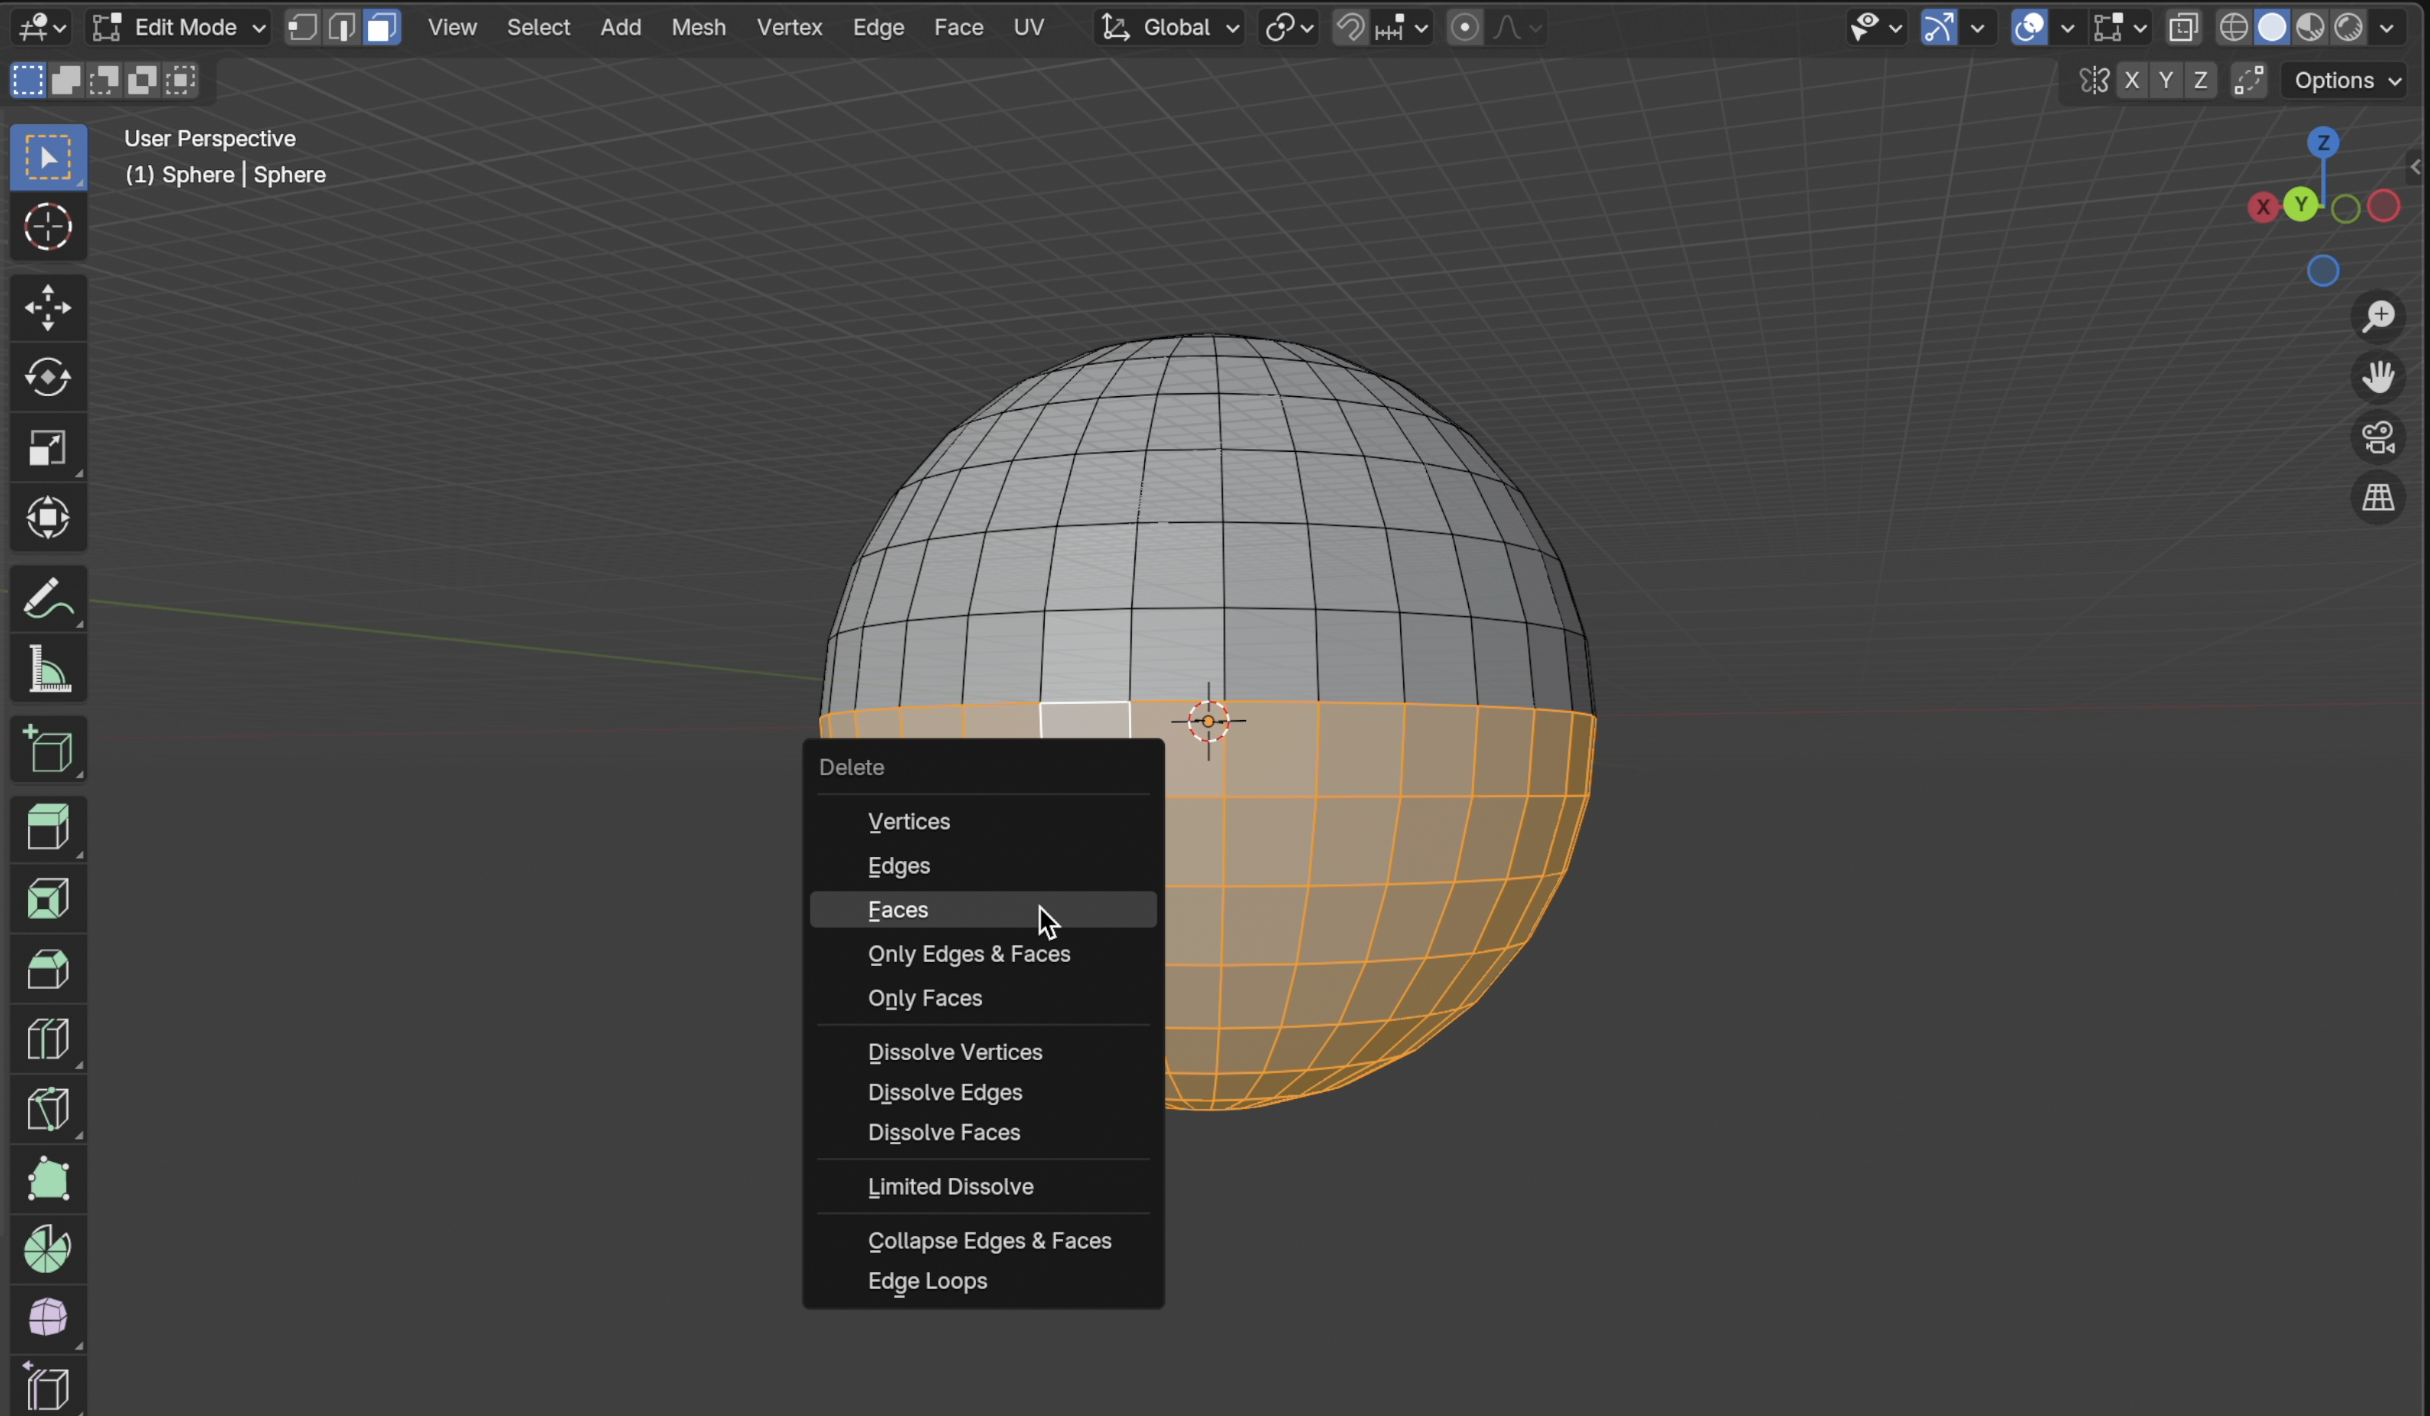
X→ Delete Faces.

- Now you have an open hemisphere dome.
Step 4: Apply Transformations

- Press Tab. Go to Object Mode,
Ctrl + A→ Apply All Transforms (Location, Rotation, Scale).
Ensures correct scale when importing into Horizon.
Step 5: Add Material
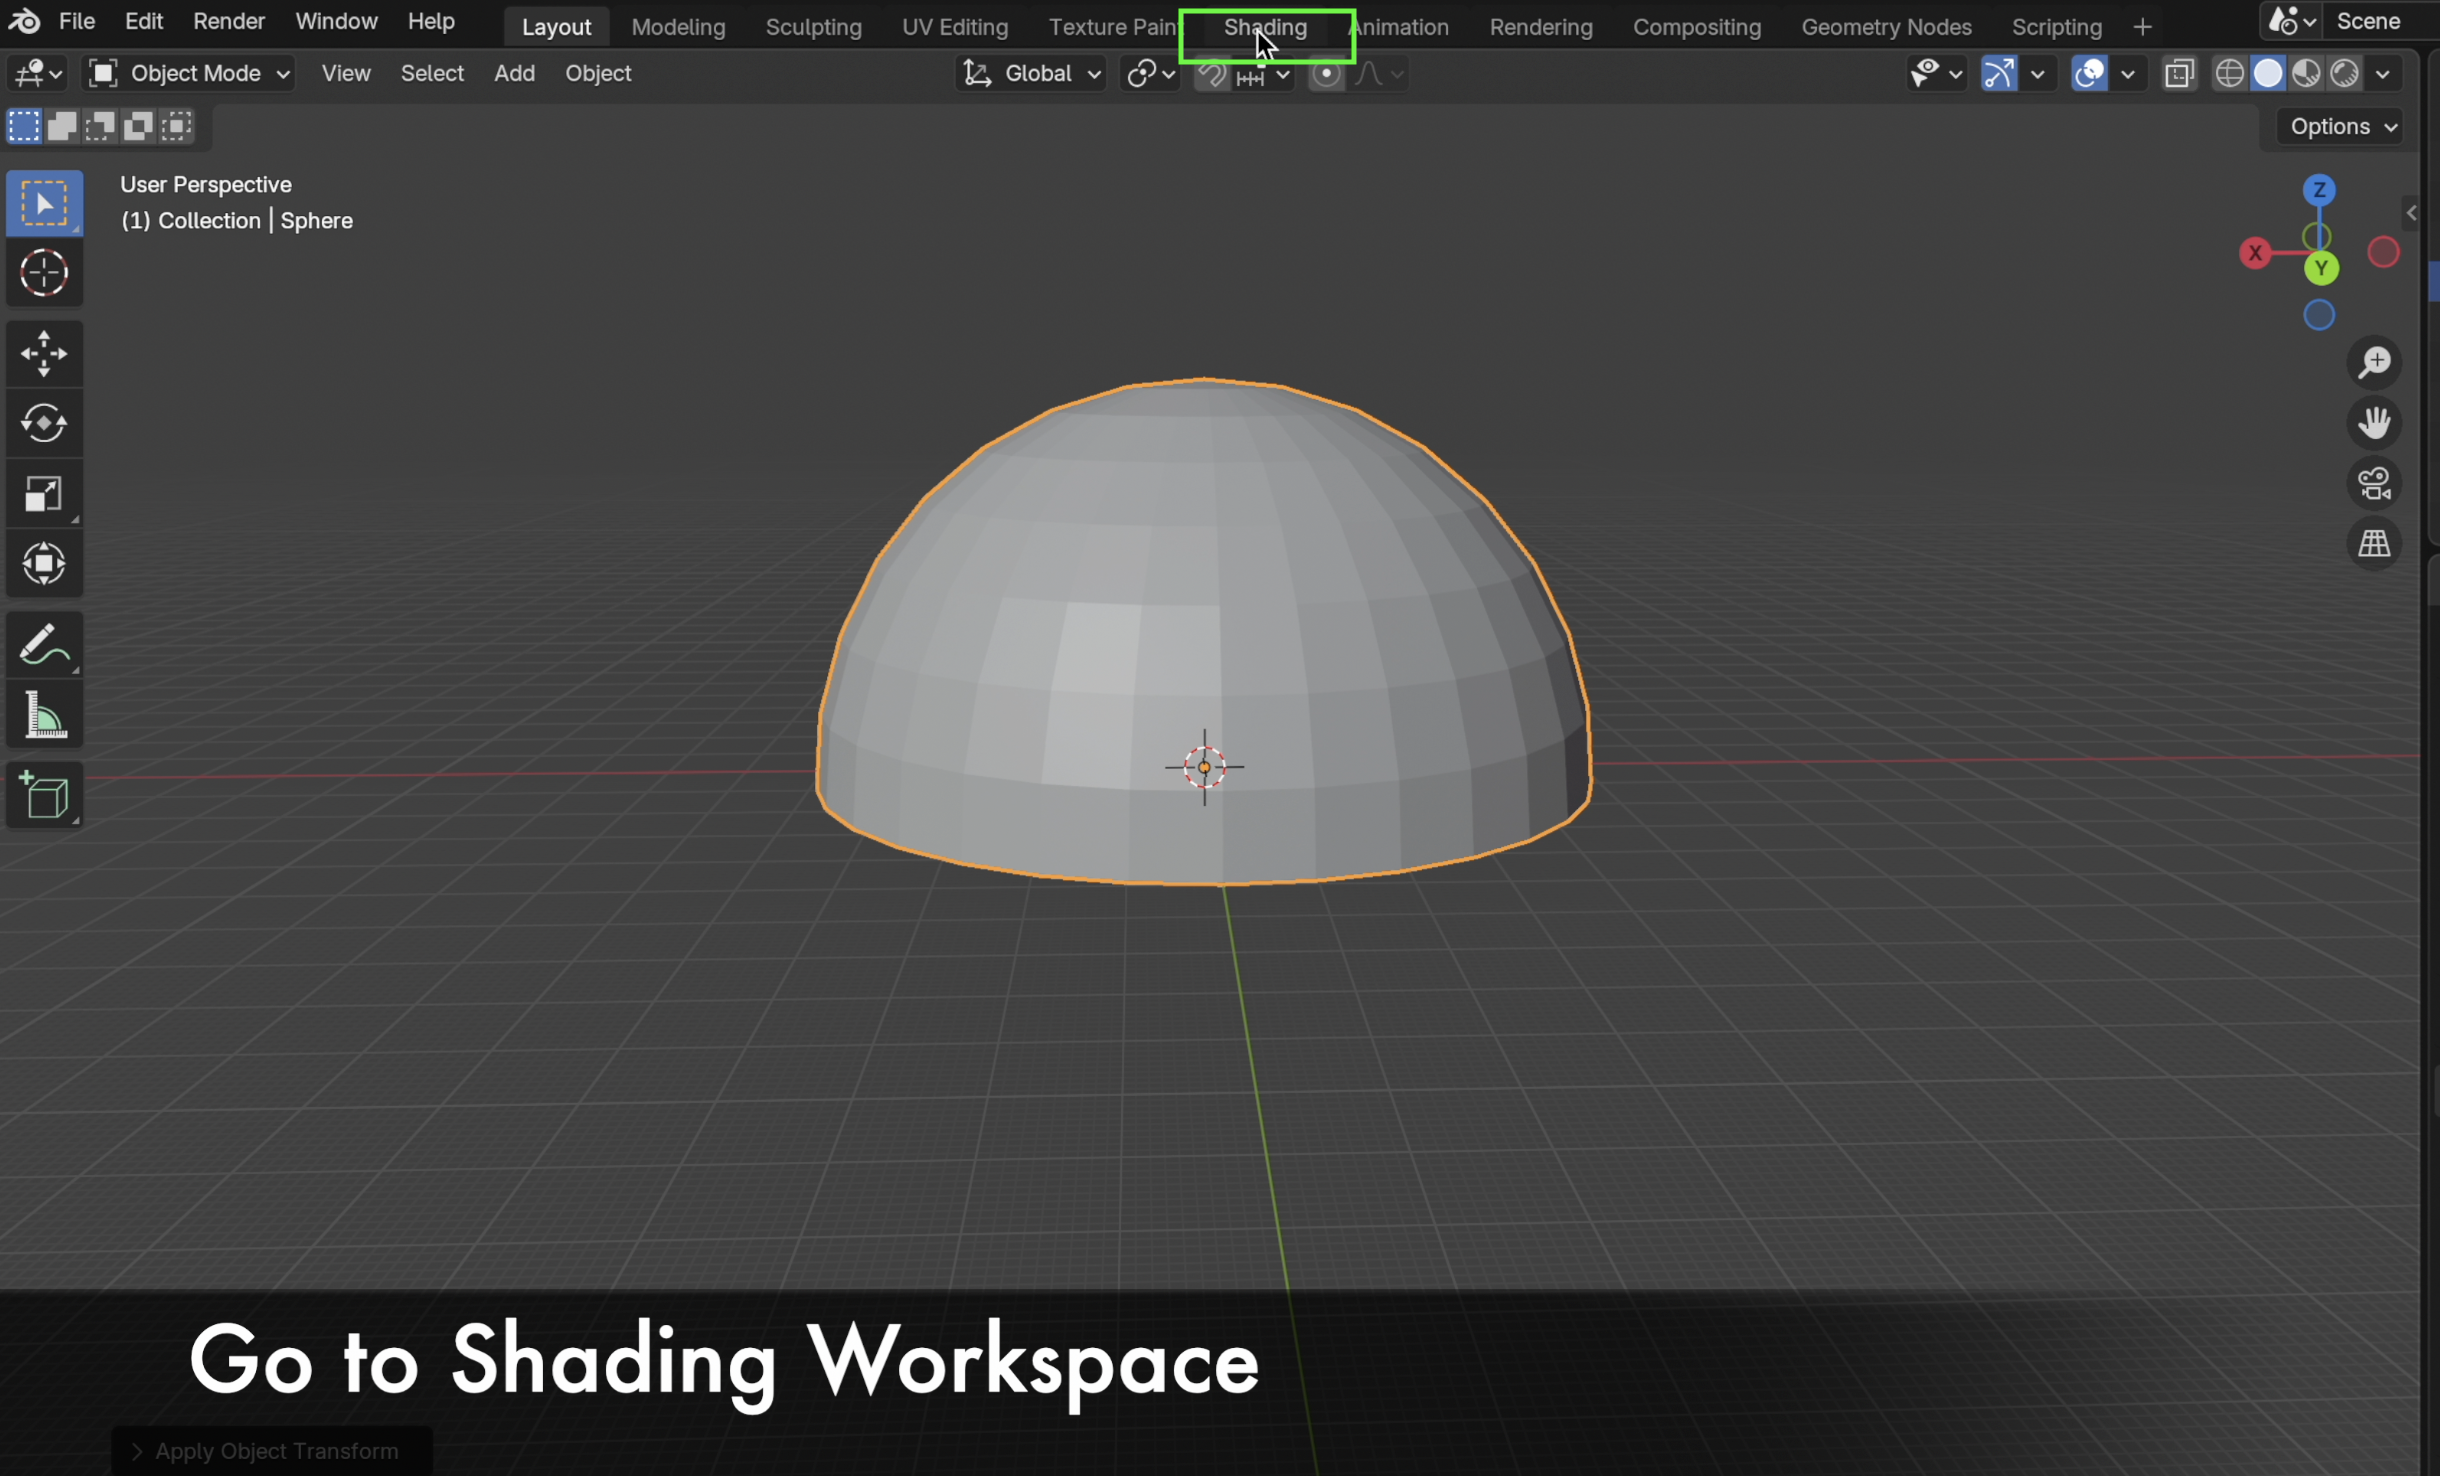
- Switch to Shading Workspace.
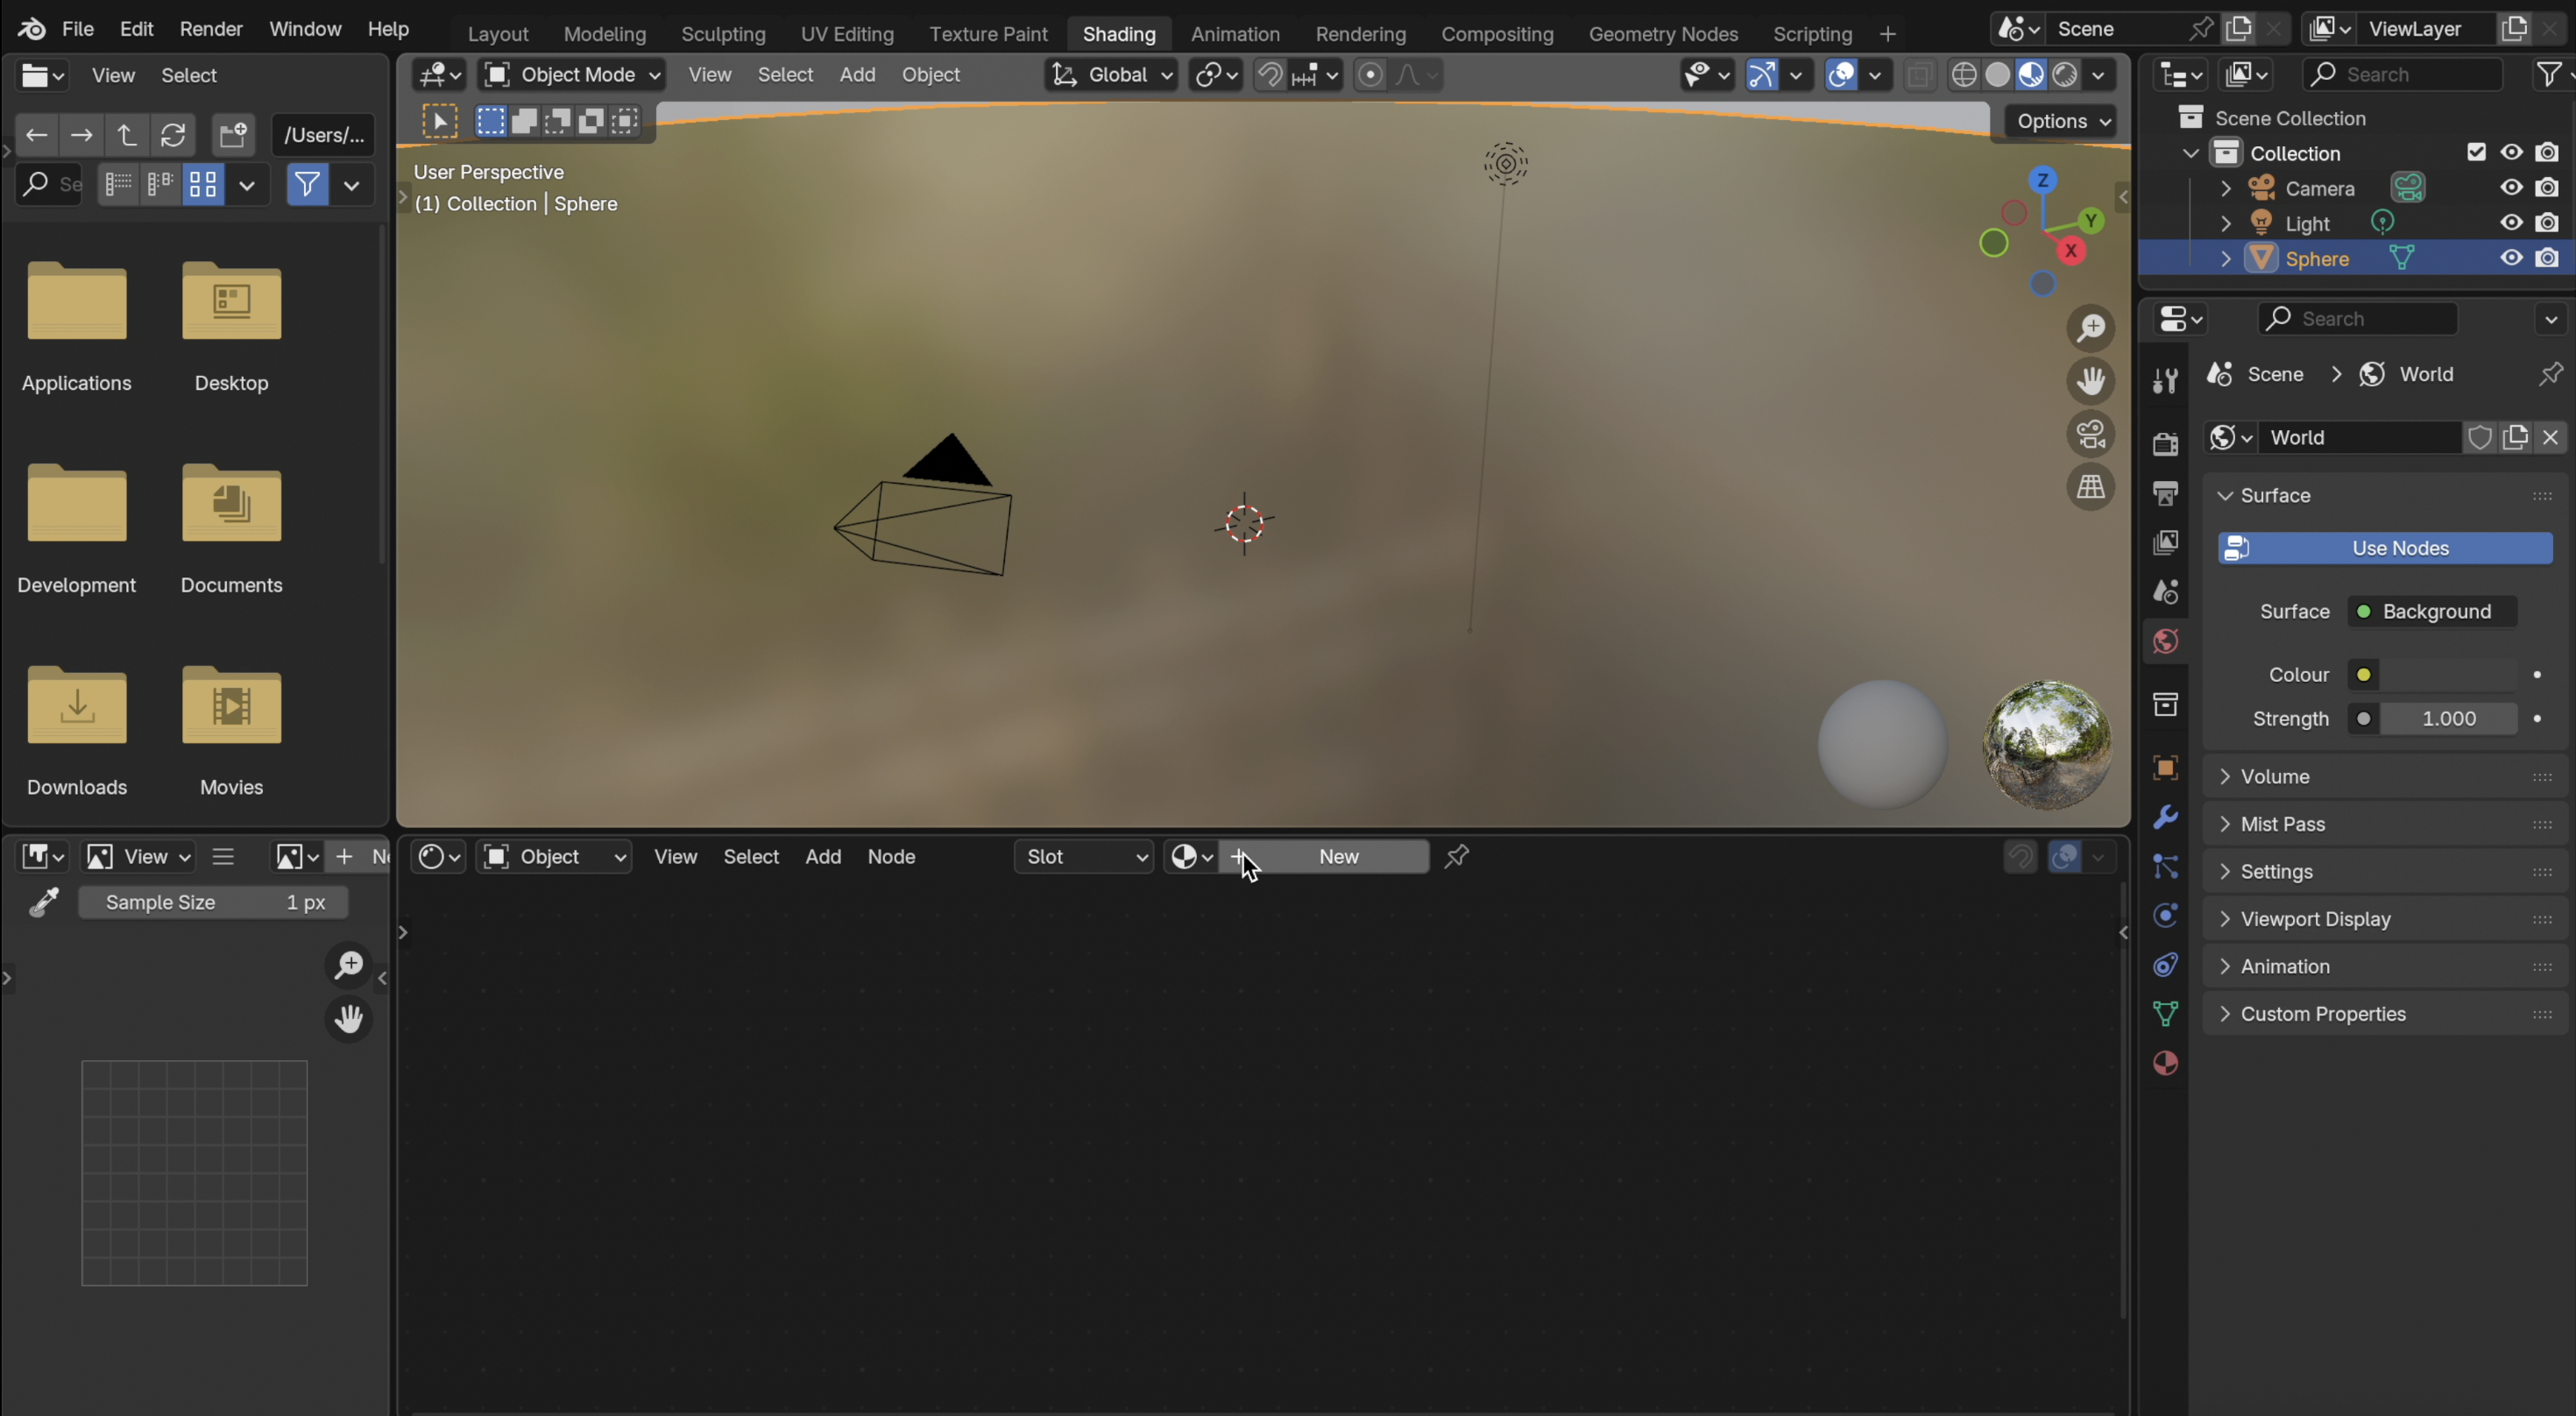
-
In Material Properties:
- Click + New → Rename to Skydome → Use Default Base Colour: white.
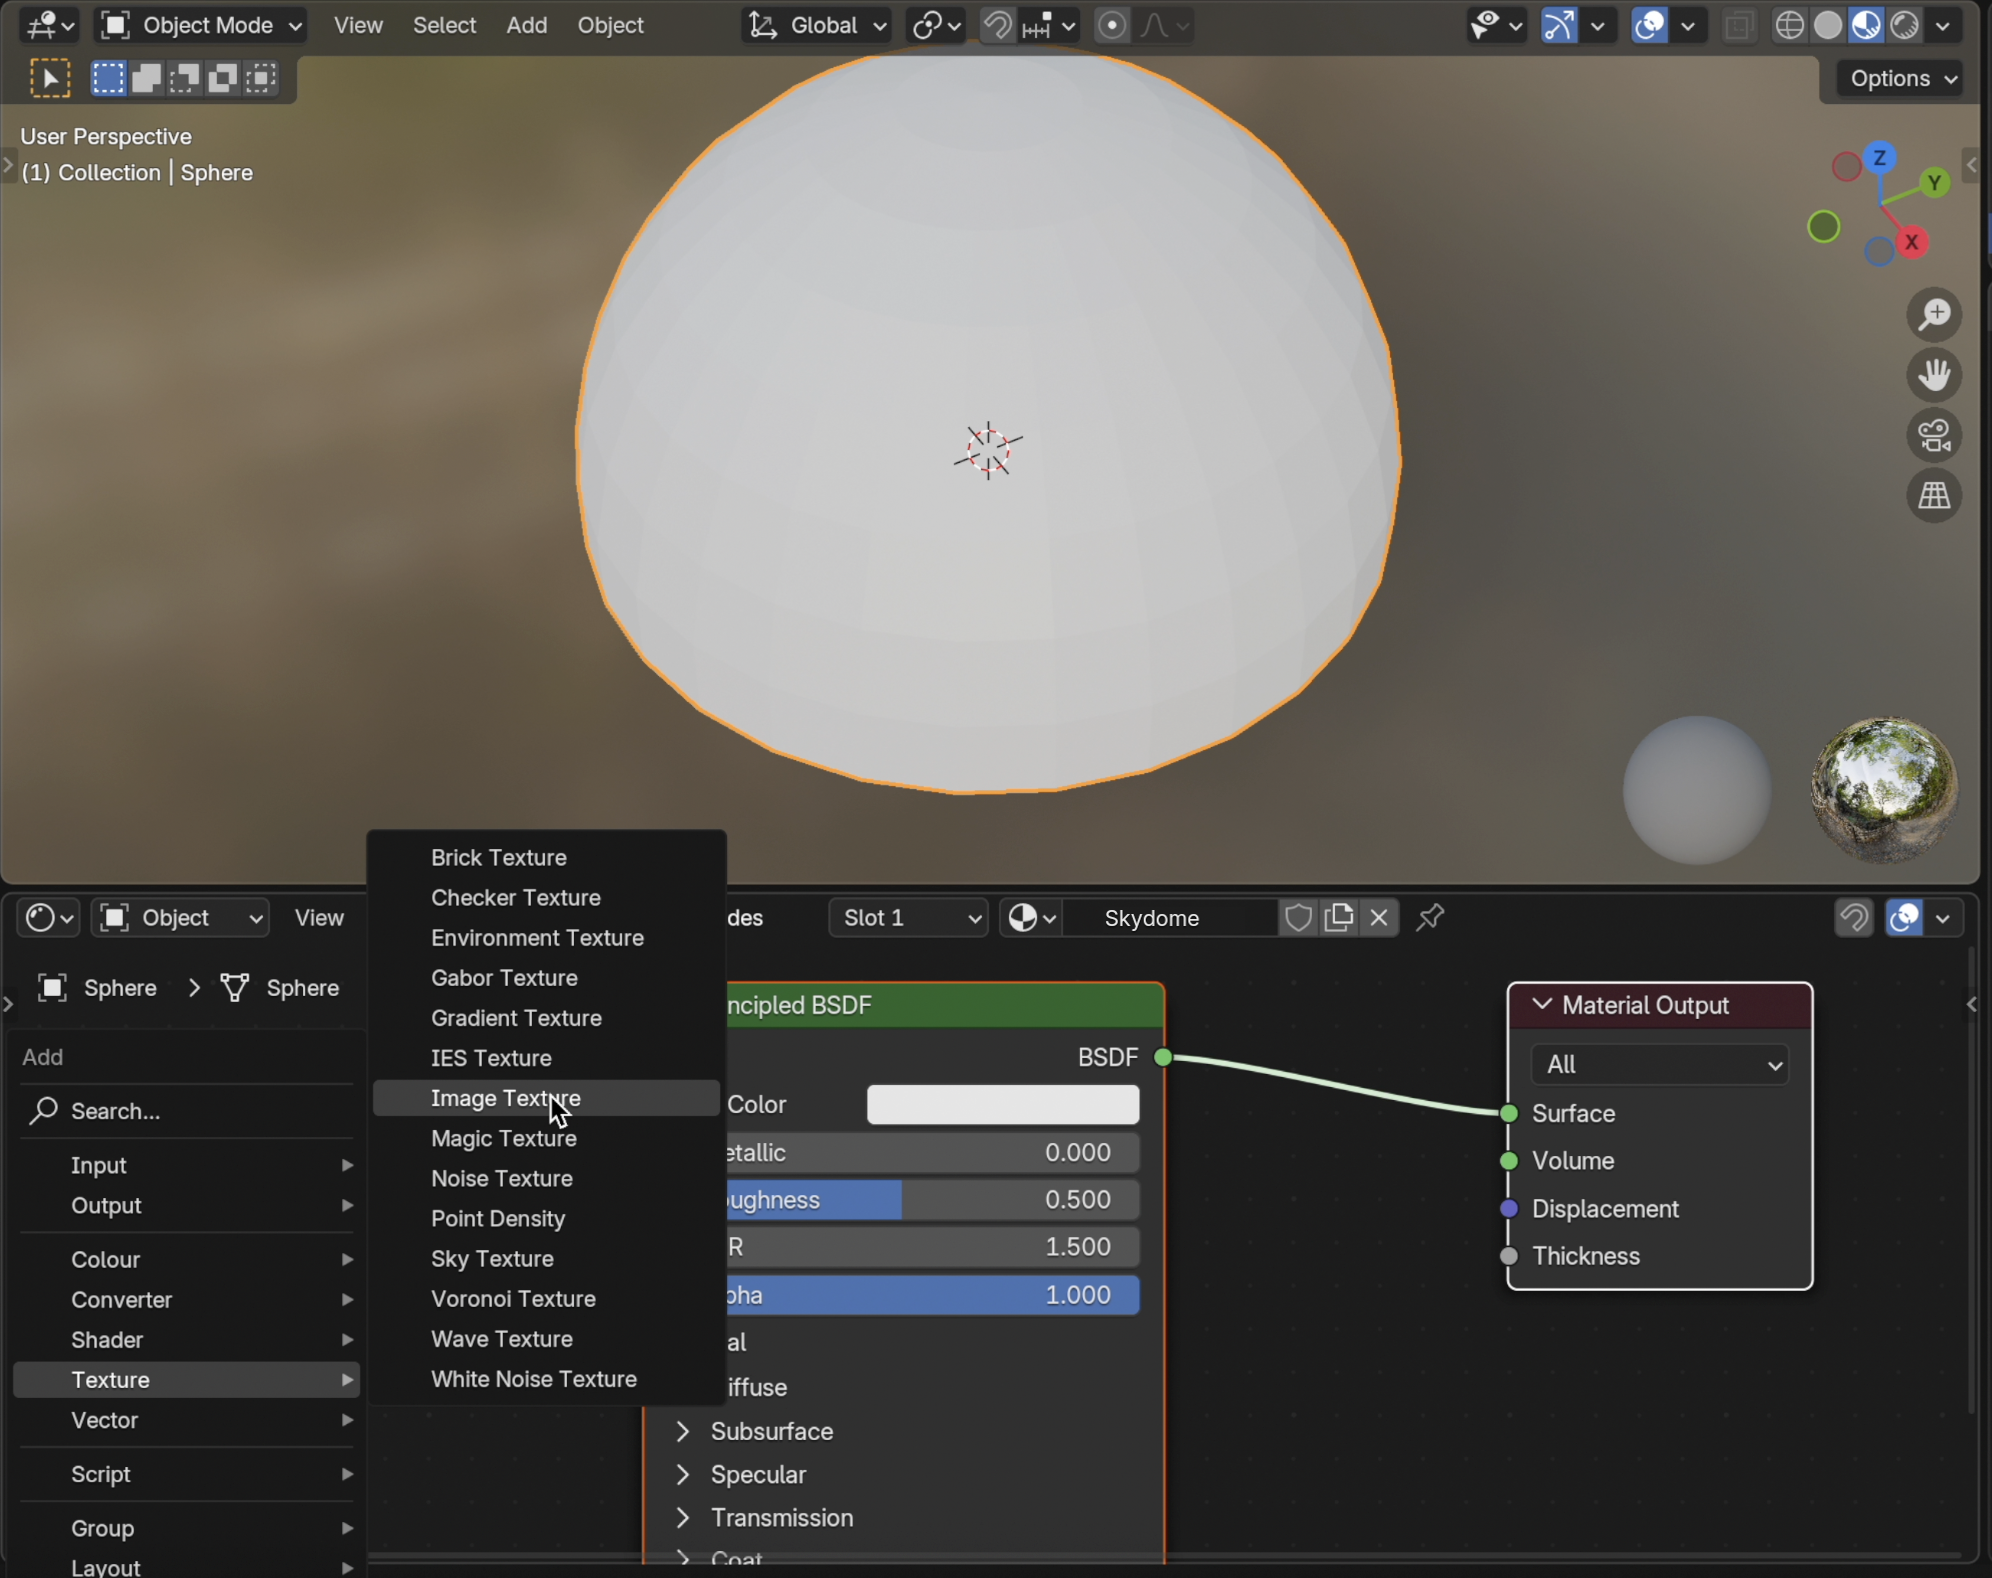
- Add a new Image Texture node:
Shift + A→ Texture → Image Texture.
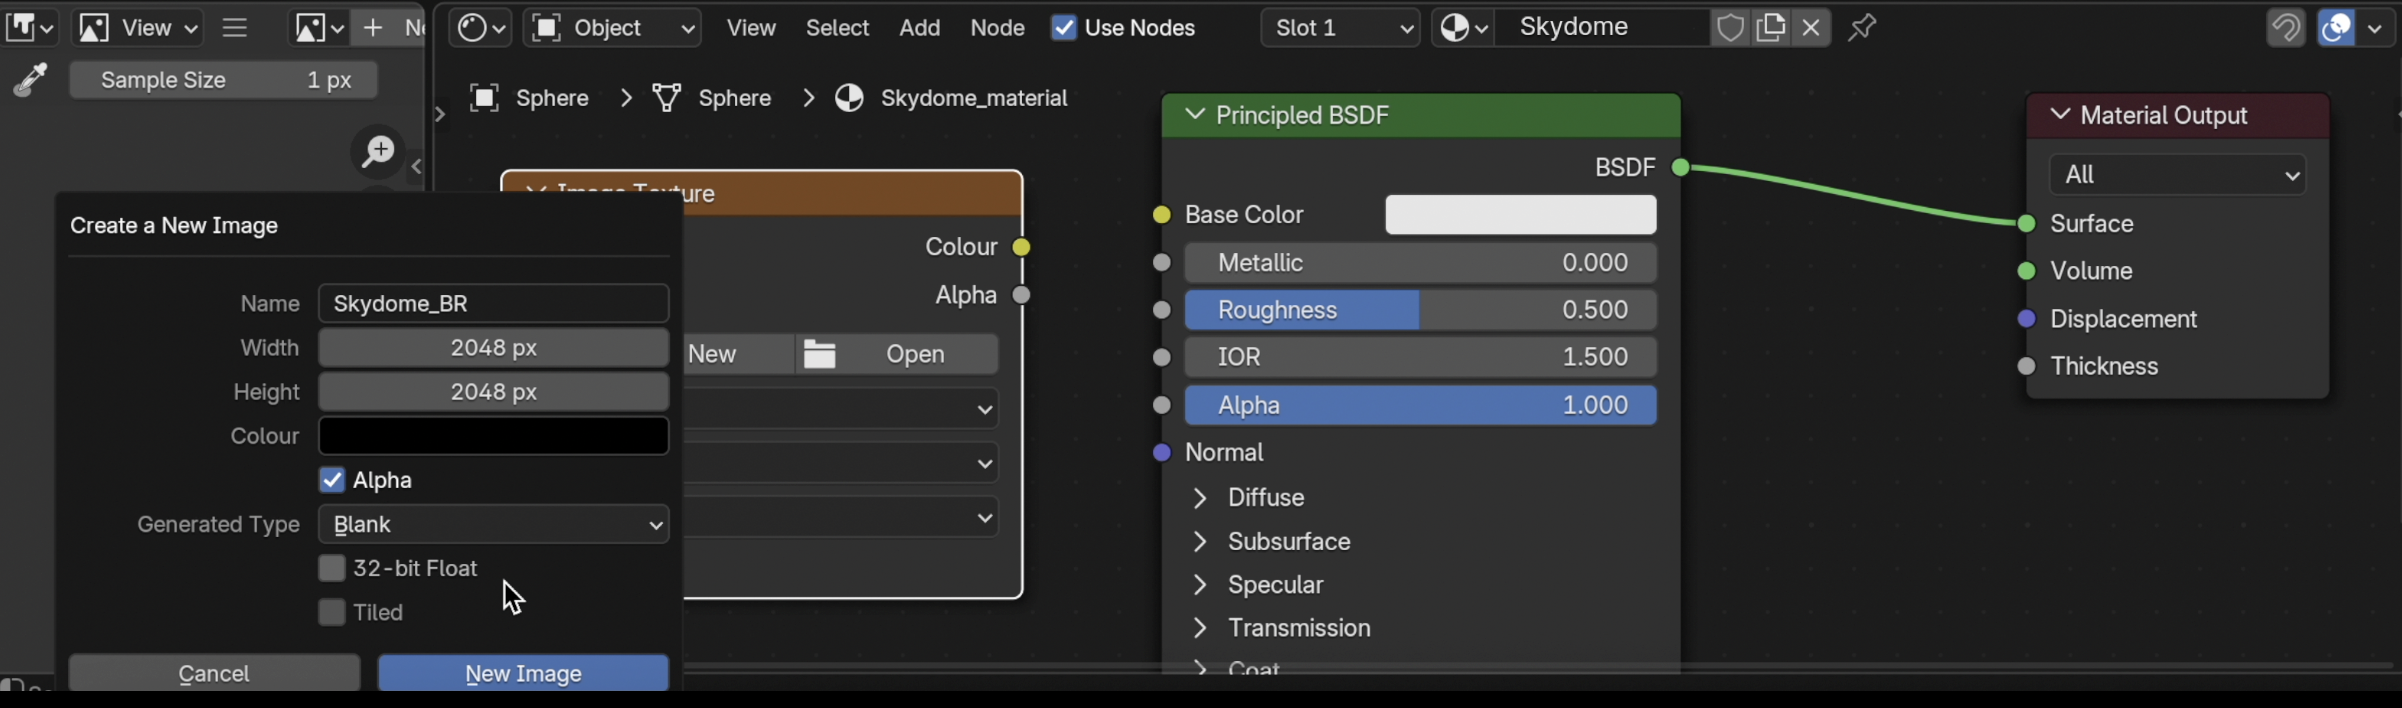
- Click New, name it
Skydome_BR.- Size:
2048 x 2048(power of 2). - Color: Black (default is fine).
- Size:
-
Click New Image.
- Make sure the Image Texture node is Selected, so it’s active. It should have a white ouline. (Don’t connect yet.)
- Best Practice: Use one material for performance. You can swap colours in code.
Step 6: Optimise Polygon Count
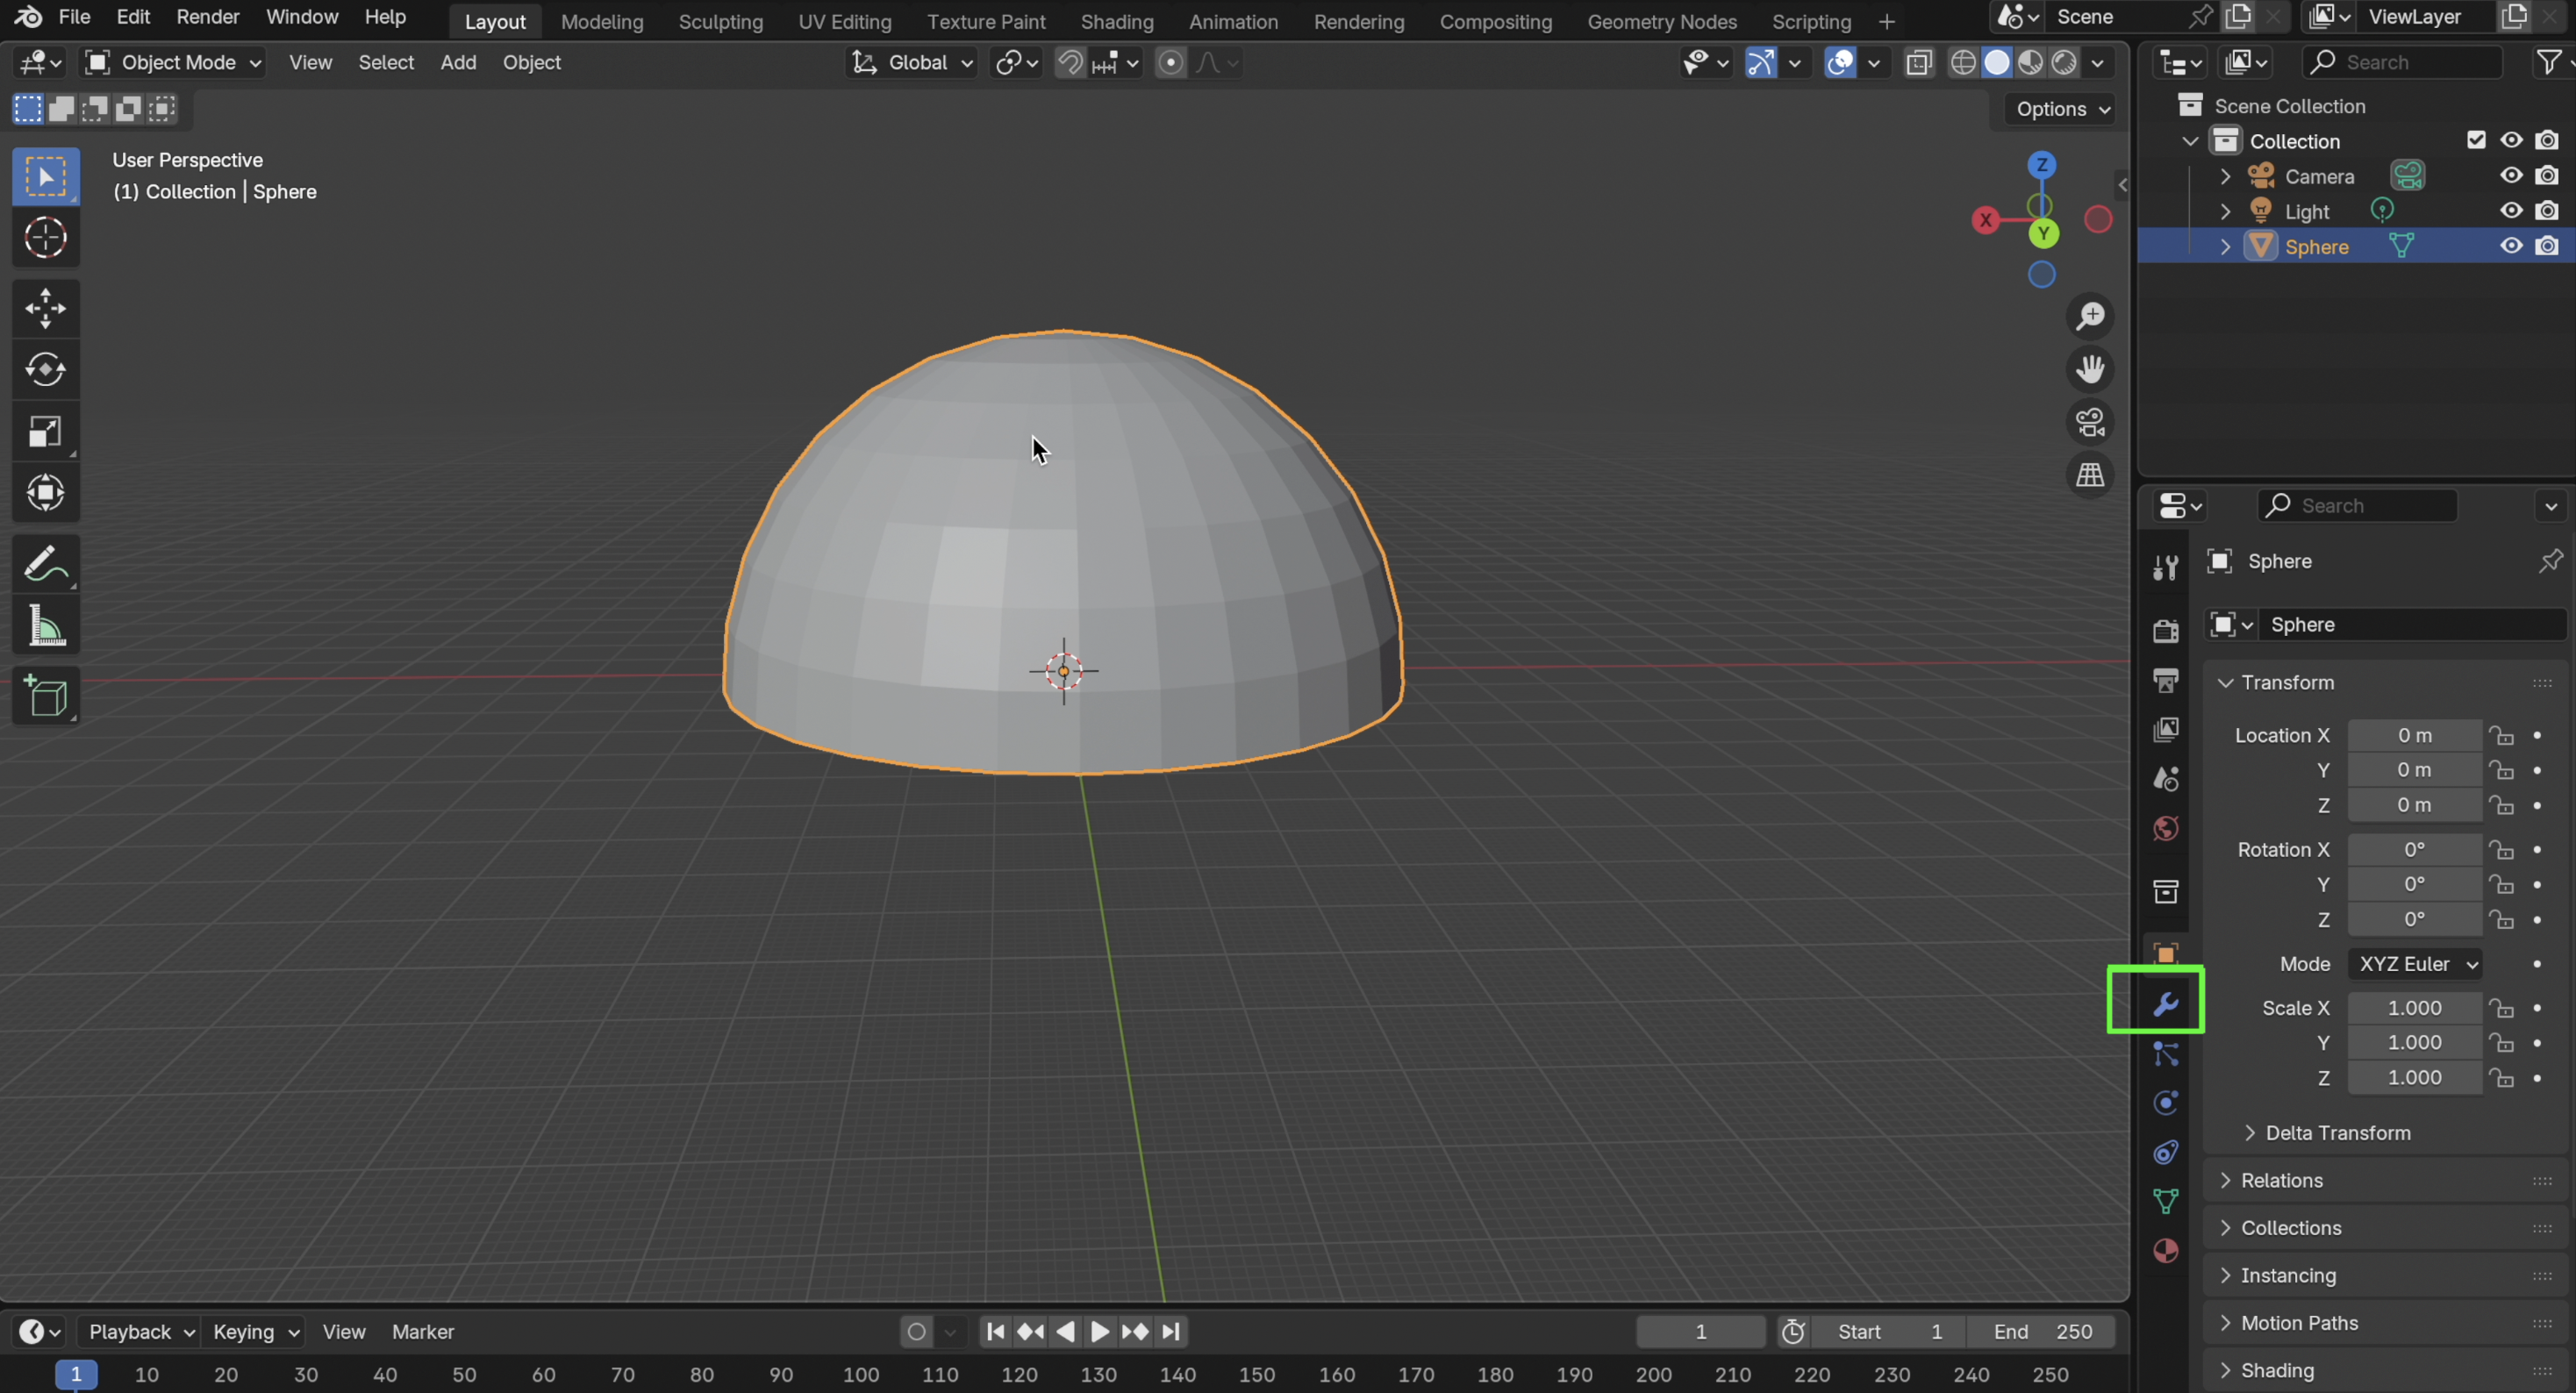
- Switch to Layout Workspace. Object Mode → Select dome

- Select Modifier tab → Modifier Properties → Decimate Modifier.
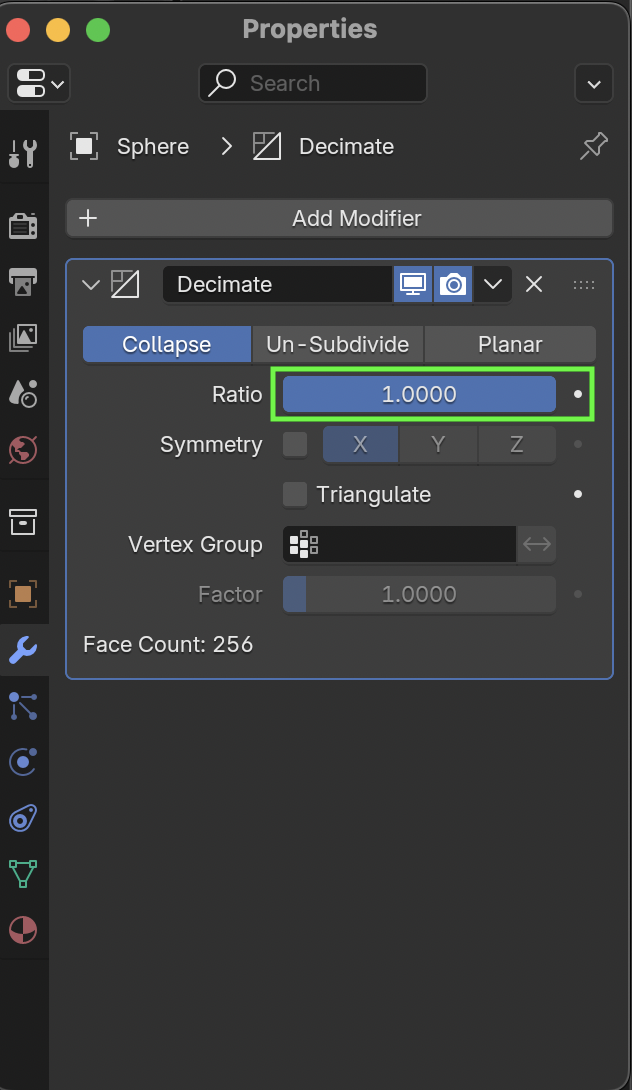
- Set Ratio: 0.5 (50% poly reduction).
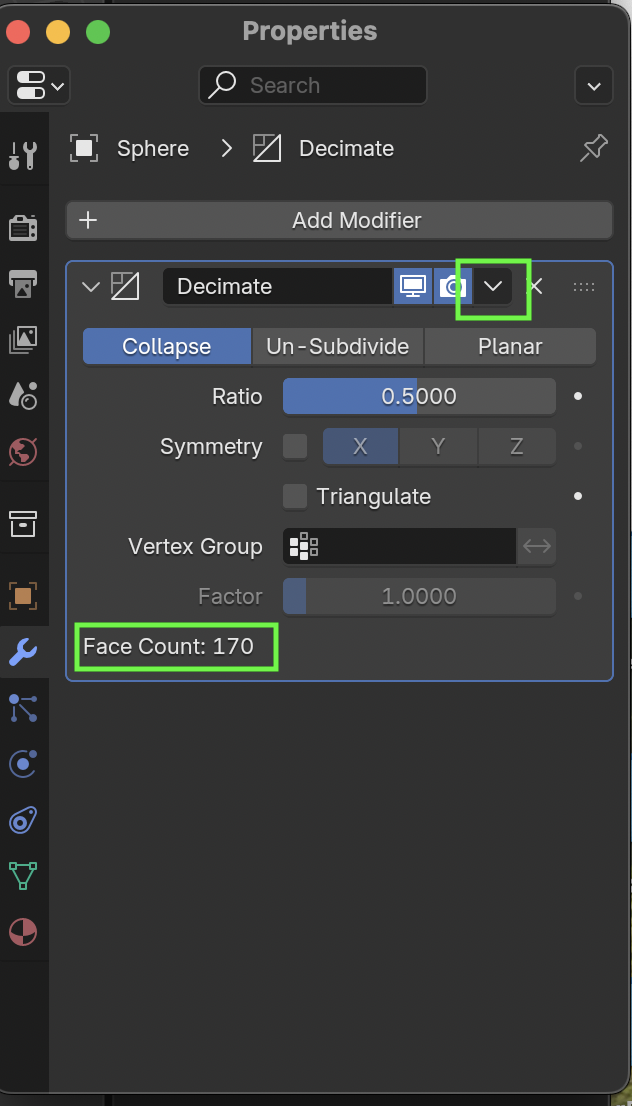
-
Apply modifier.
-
Check face count, it should reduce and still look good.
This is a small model, but it is still good practice! -
Save your file.
Step 7: UV Unwrap for Textures

-
In Edit Mode:
-
Select all faces (
A). -
Press
U→ Smart UV Project. -
Accept defaults → Unwrap.
Step 8: Bake the Flat Color
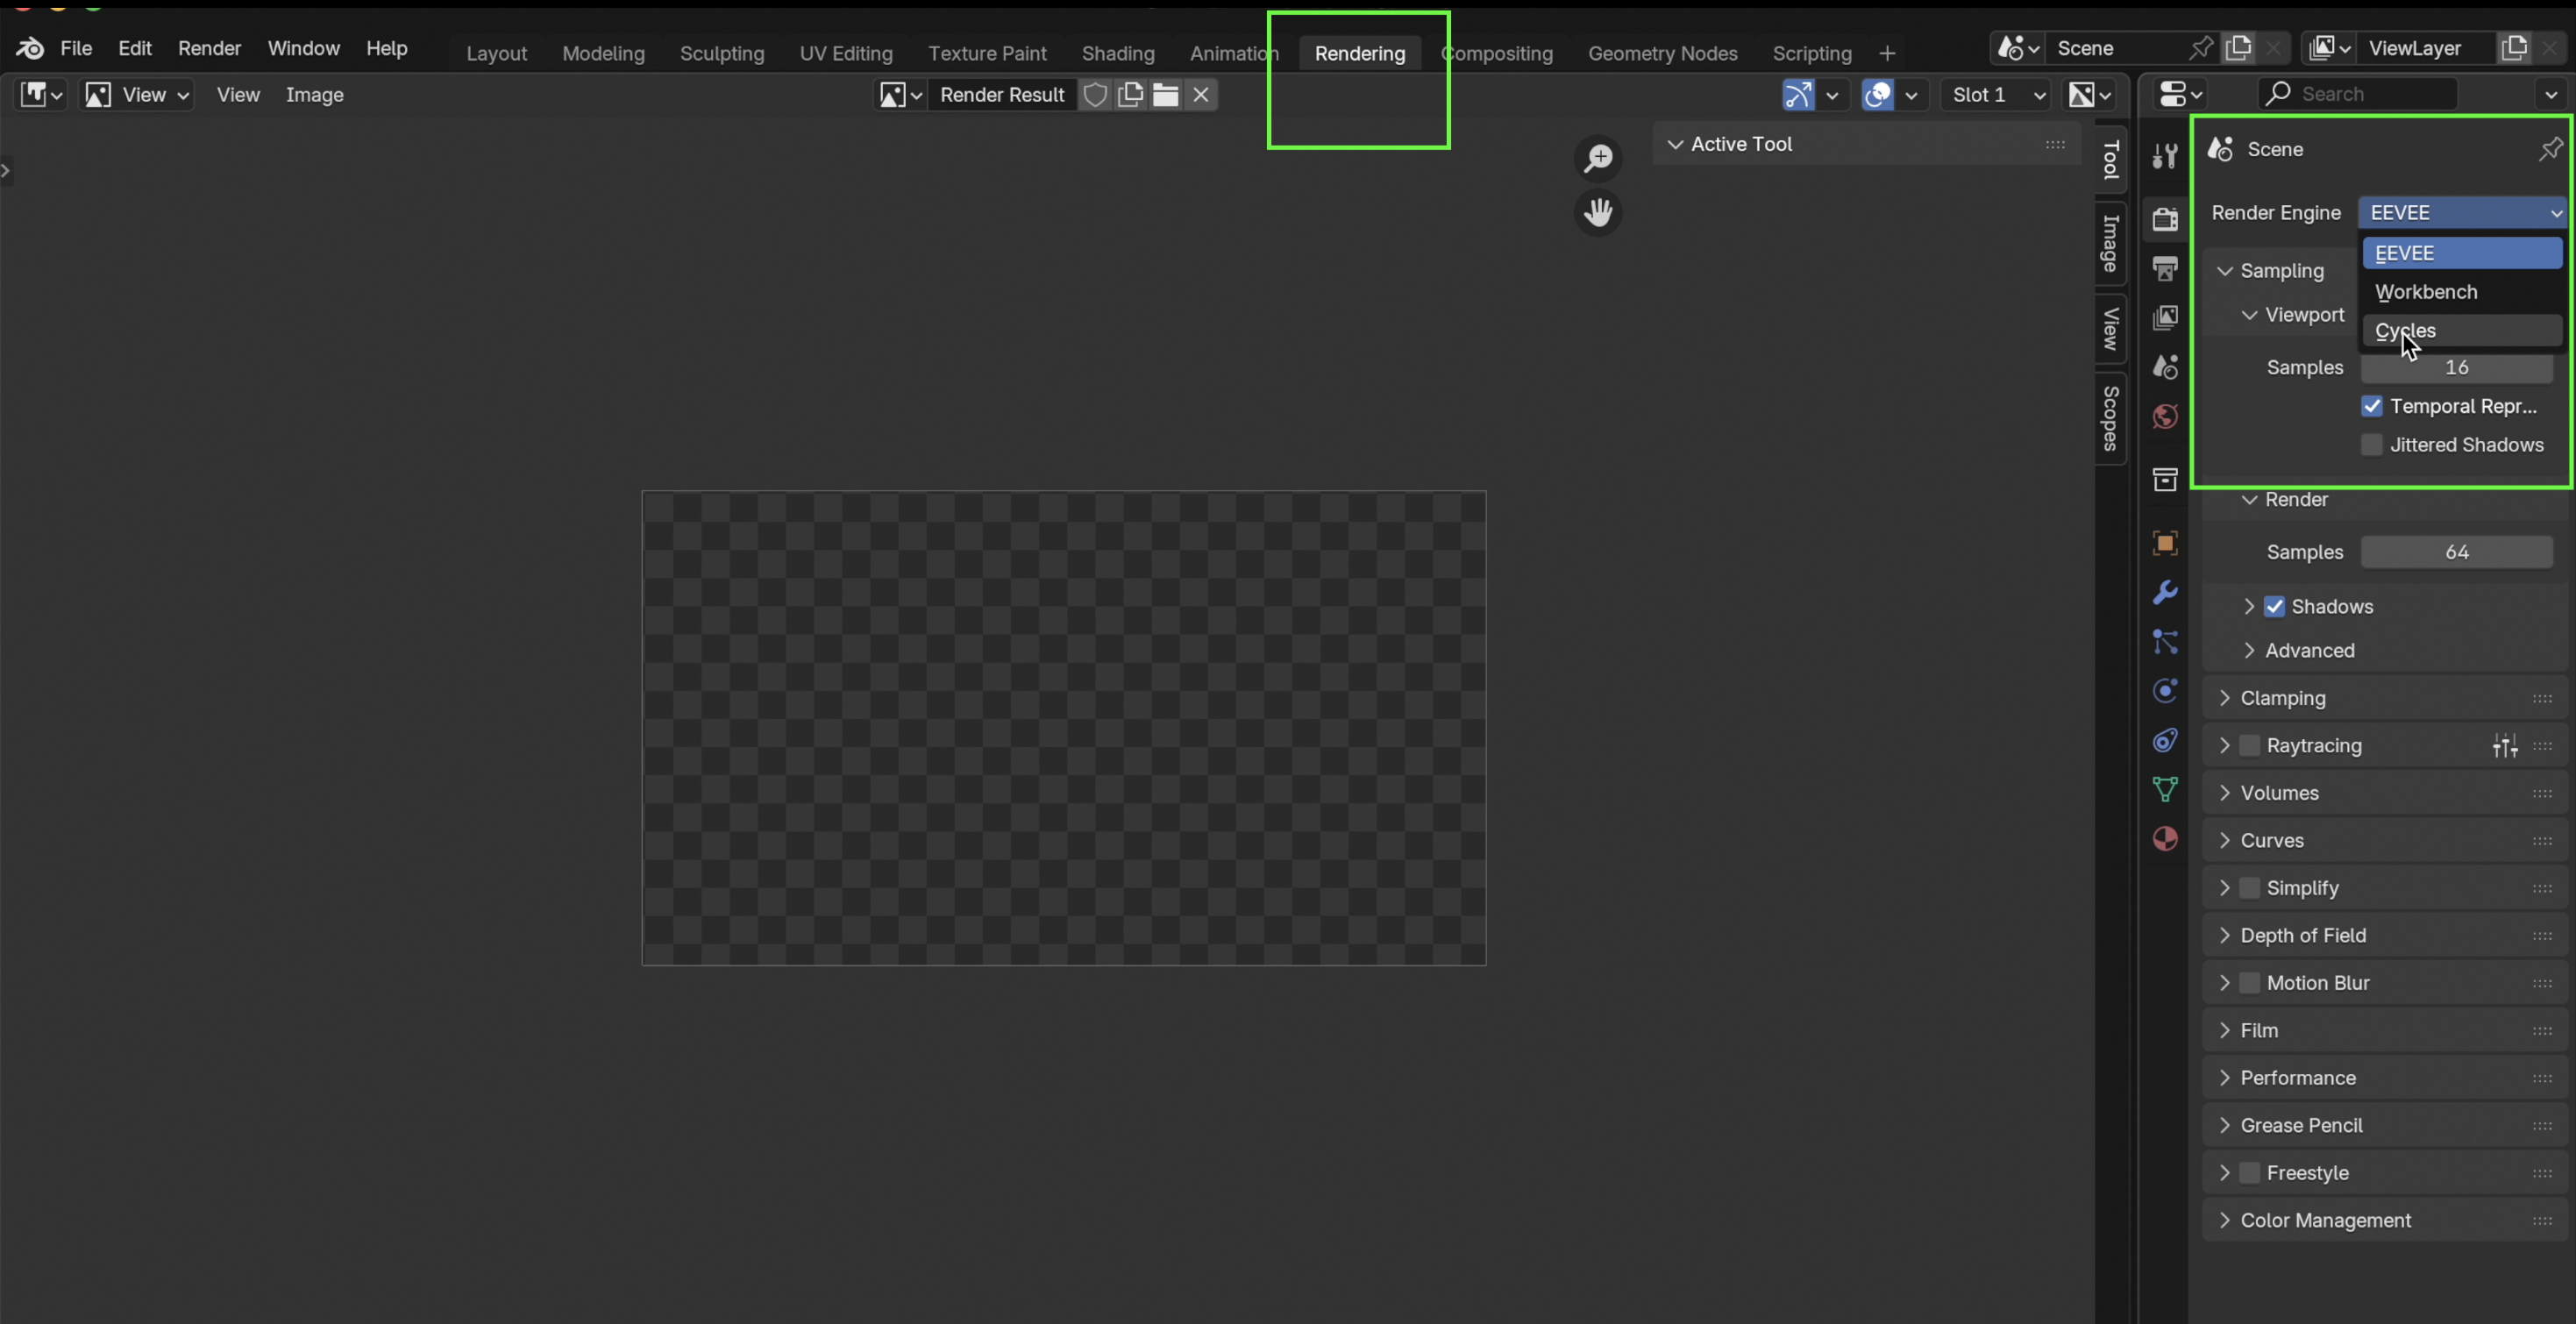
- Switch to Render Properties → set engine to Cycles.
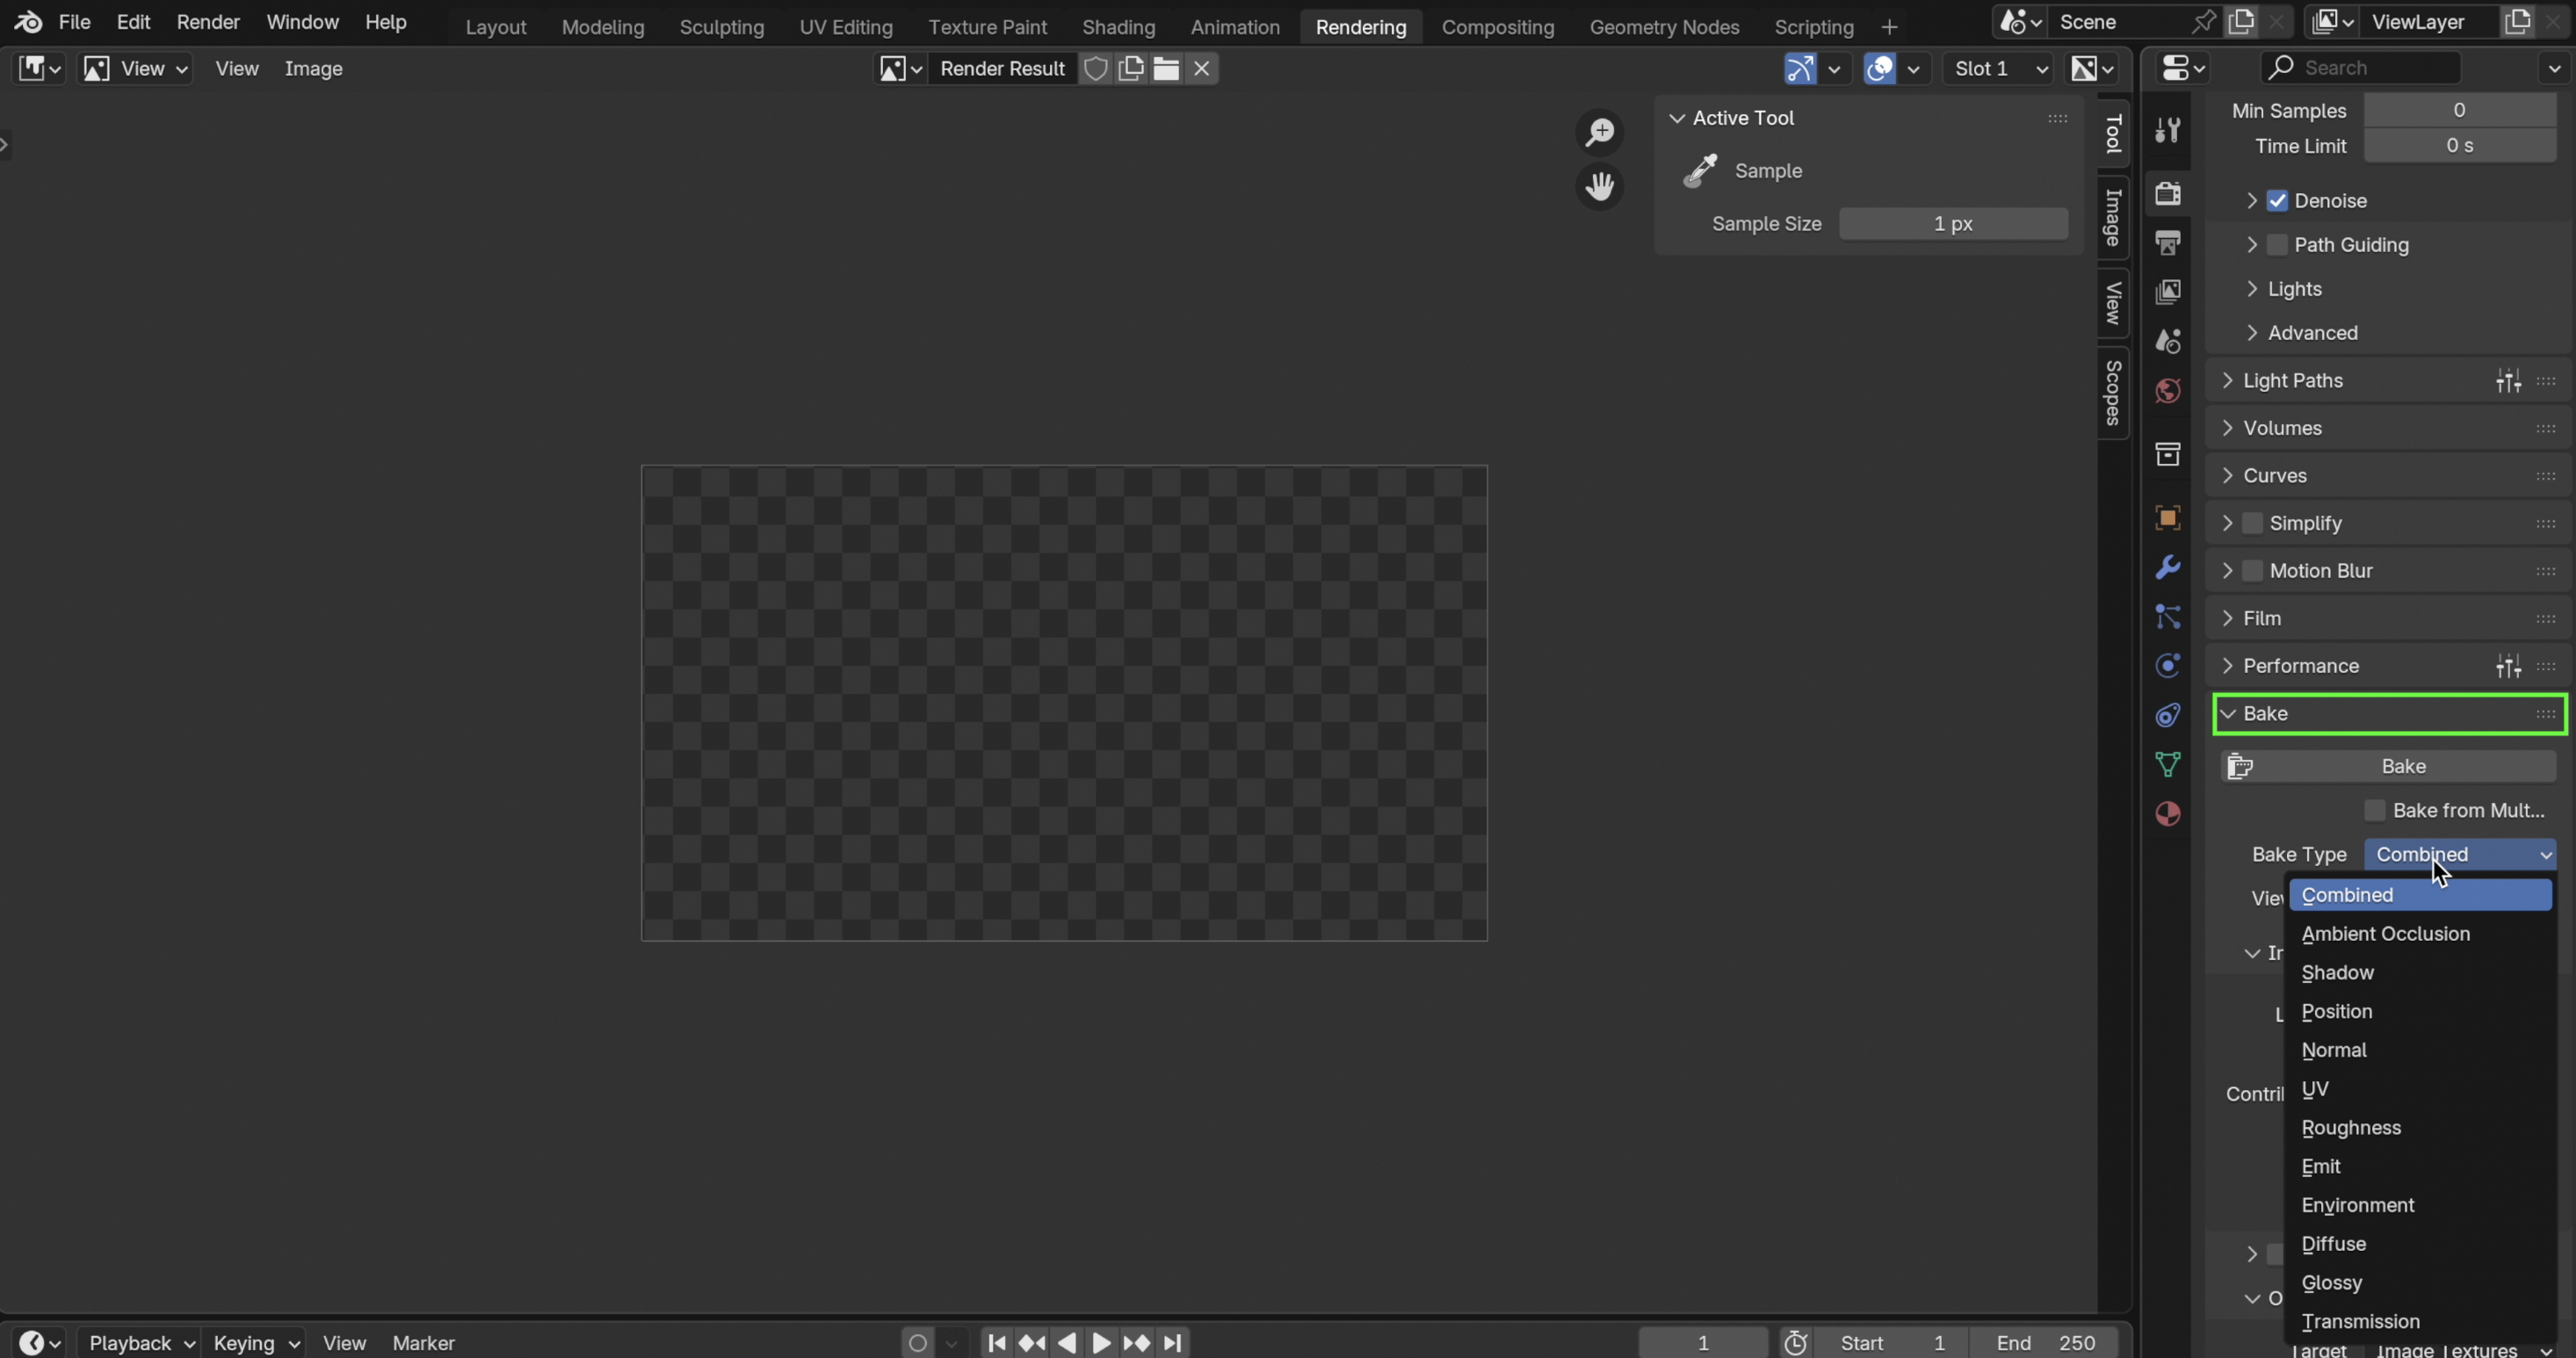
- Under Bake:
- Bake Type: Diffuse
- Influence: Only Color checked
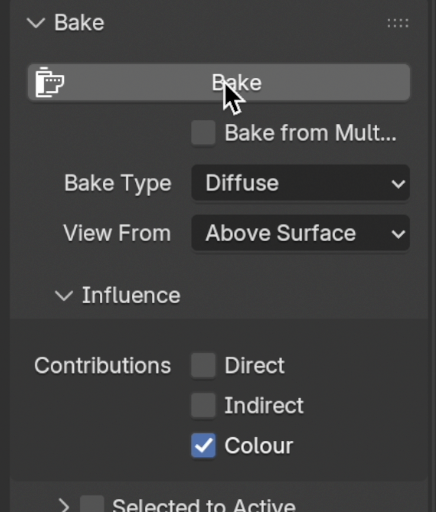
- With the material and the Image Texture node active:
- Click Bake.
Baking the texture is a way to simplify layers created in Blender. You could think of it as taking a screenshot of your material and flattening it into one simple picture, so a Horizon World can use it.
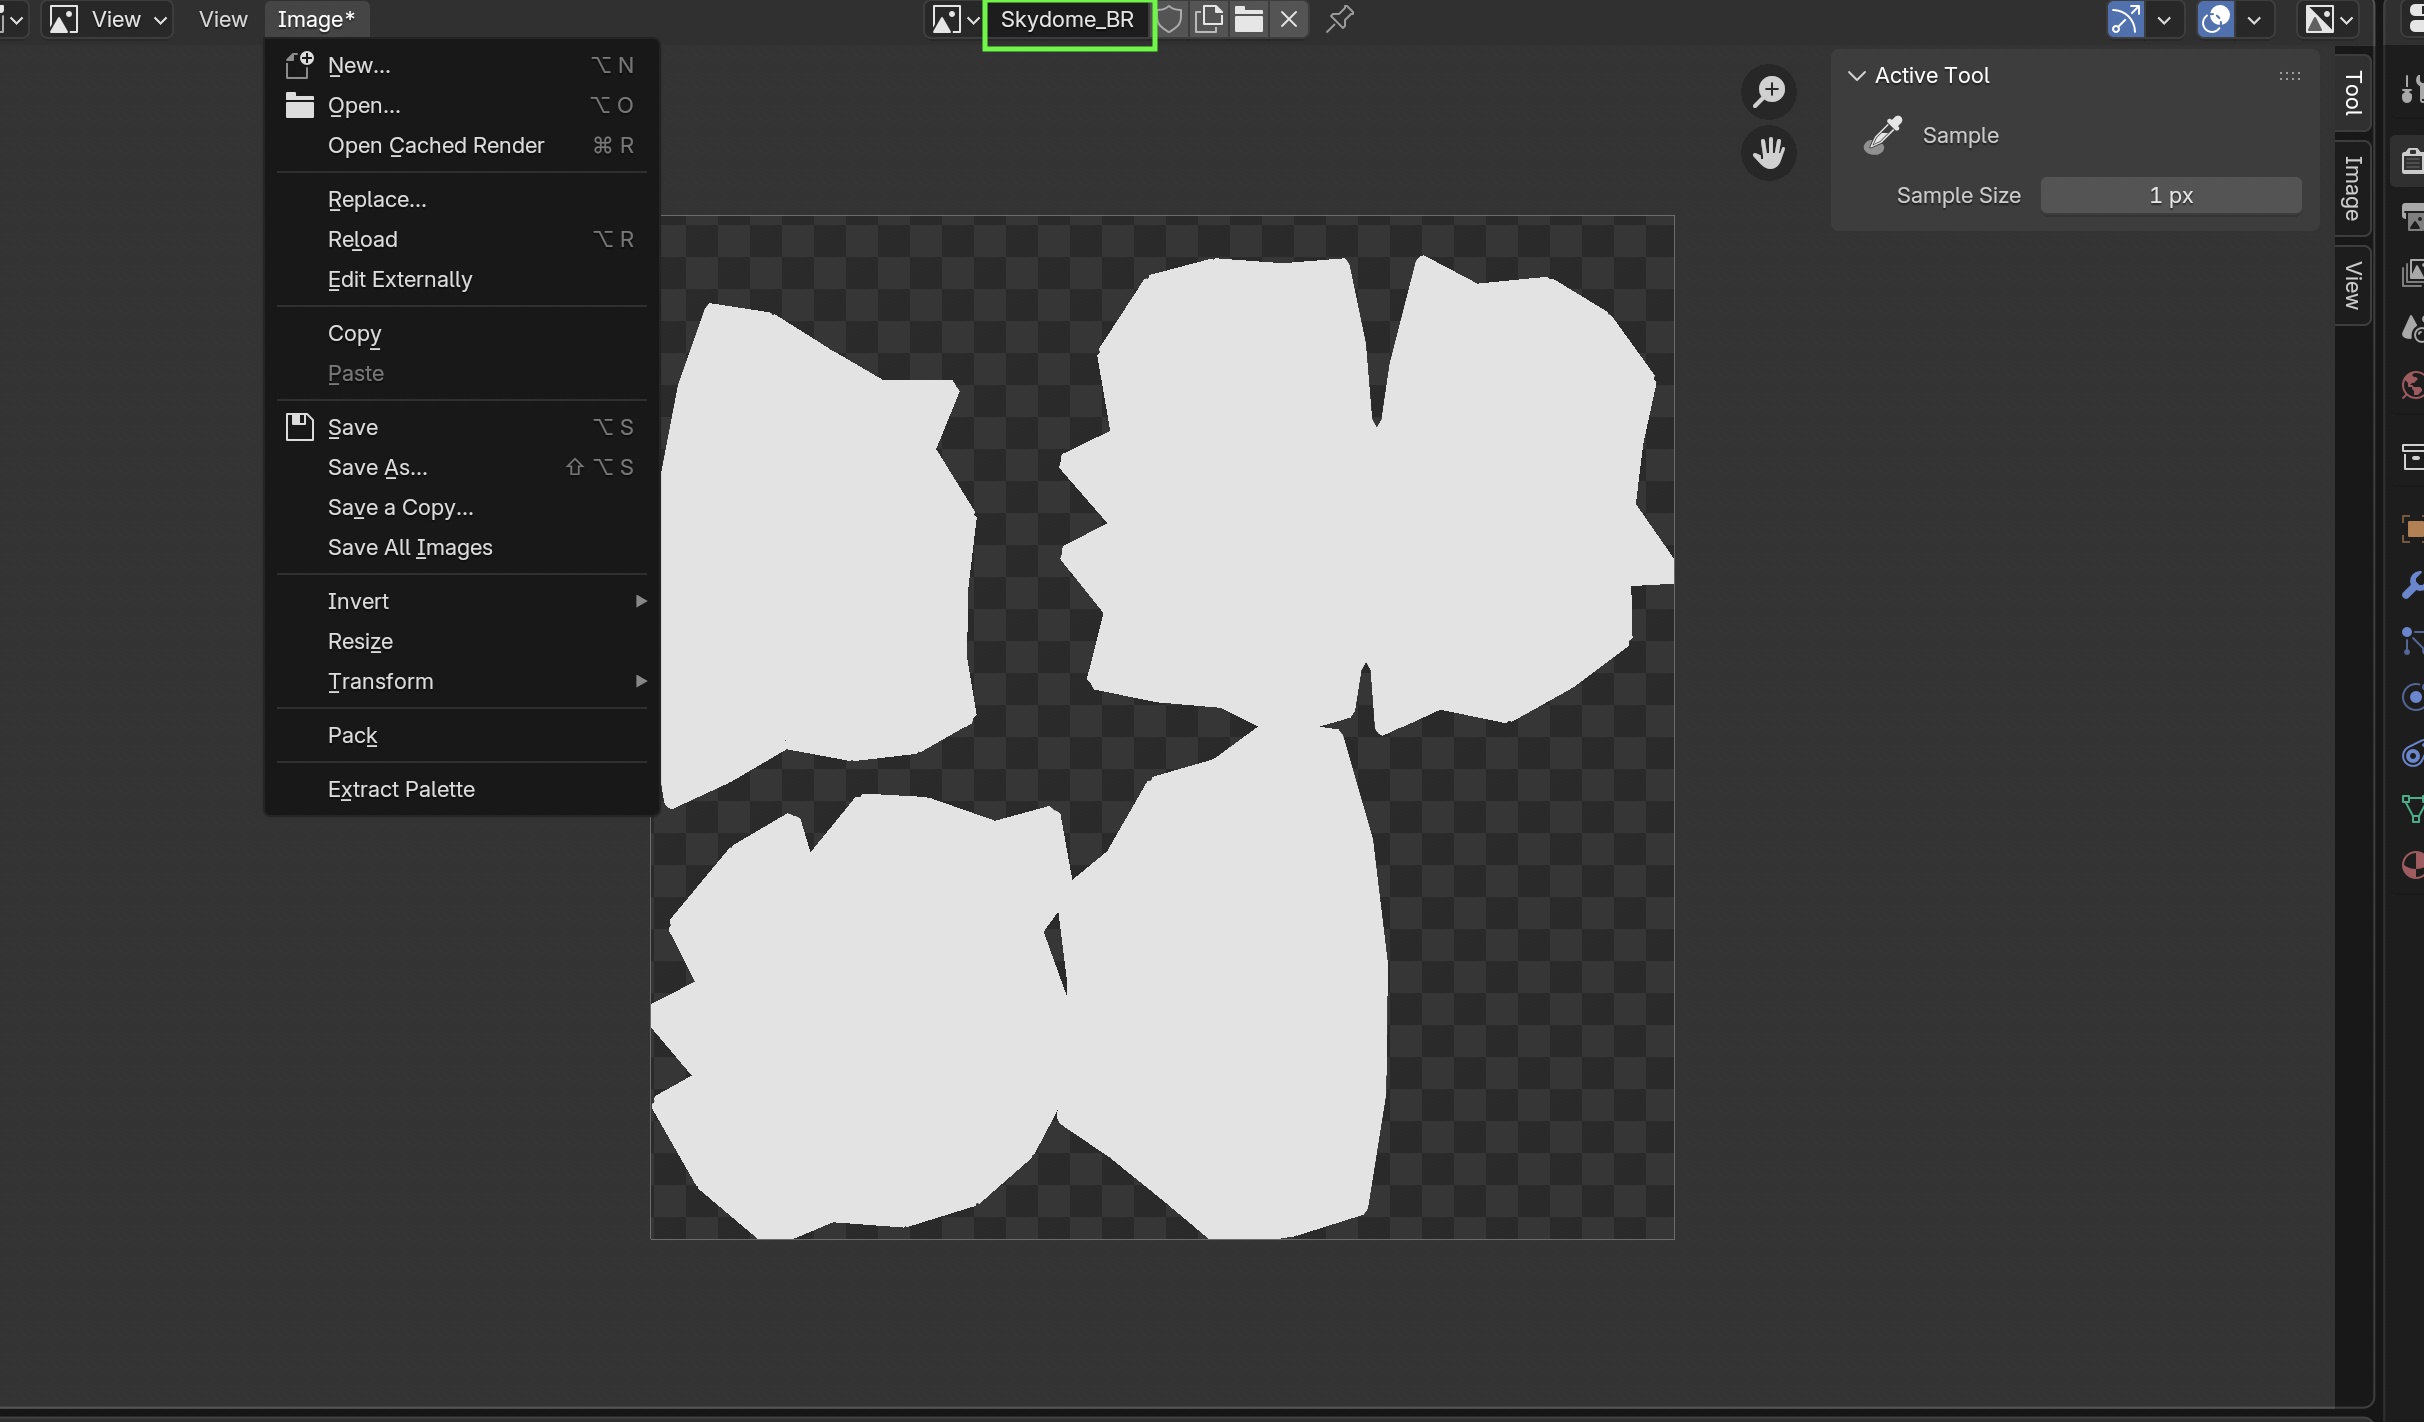
- When done, in the UV/Image Editor, save the image:
Image → Save As → Skydome_BR.png.
You now have a PNG texture with your flat color baked.
Step 9: Apply the Baked Texture to the Material
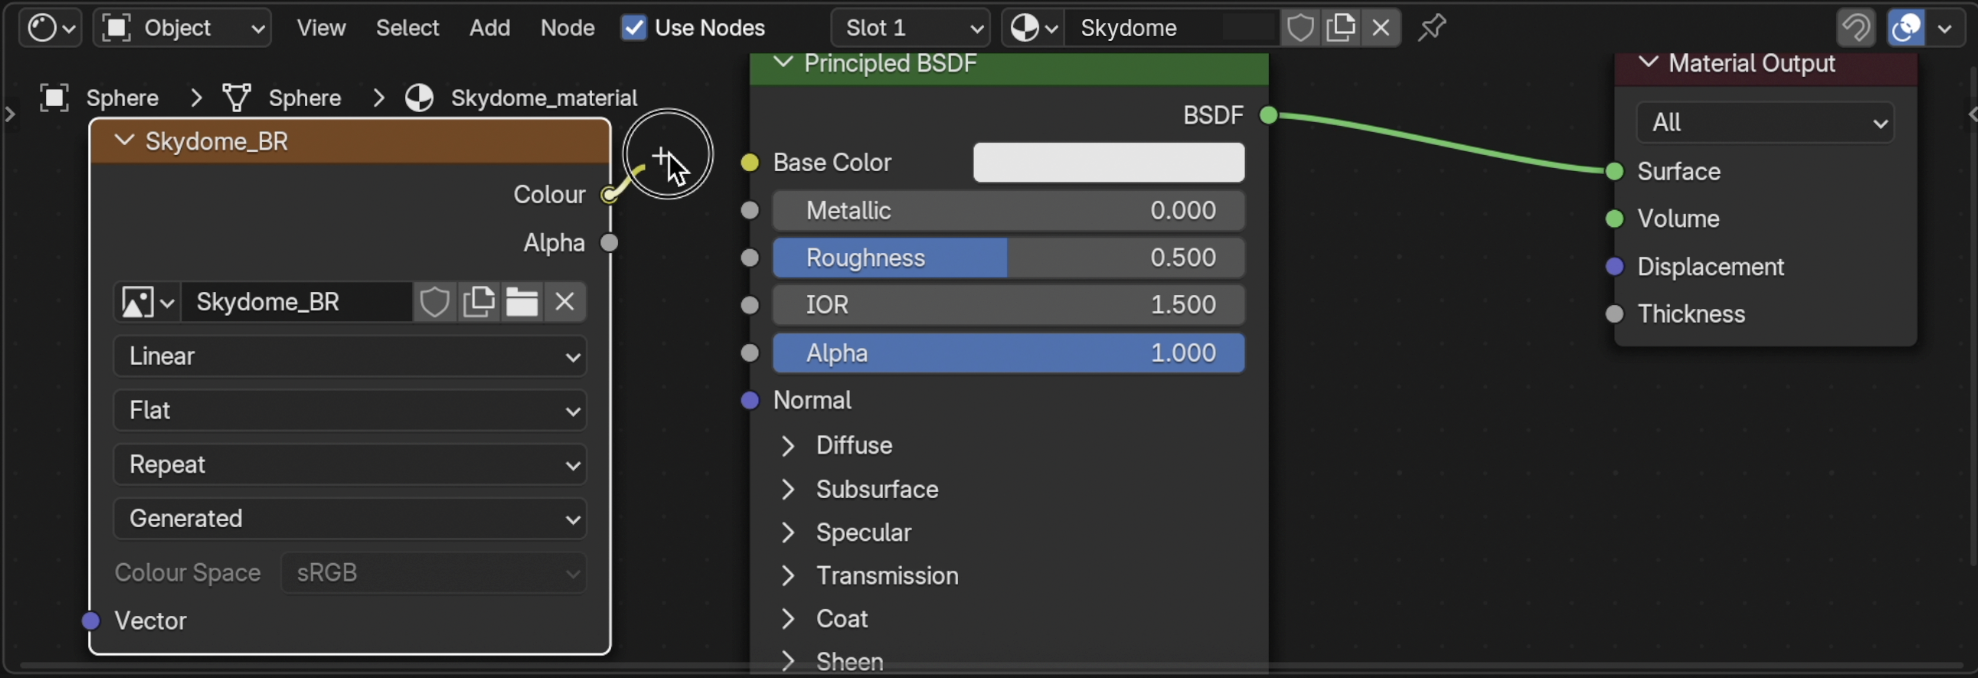
- In Shader Editor:
- Plug your
Image Texturenode (Skydome_BR.png) into Base Color of the Principled BSDF. - There are three connected nodes Material Output, Principled BSDF and the Image Texture.
- Plug your
- Your material is now texture-based (so Horizon can read it).
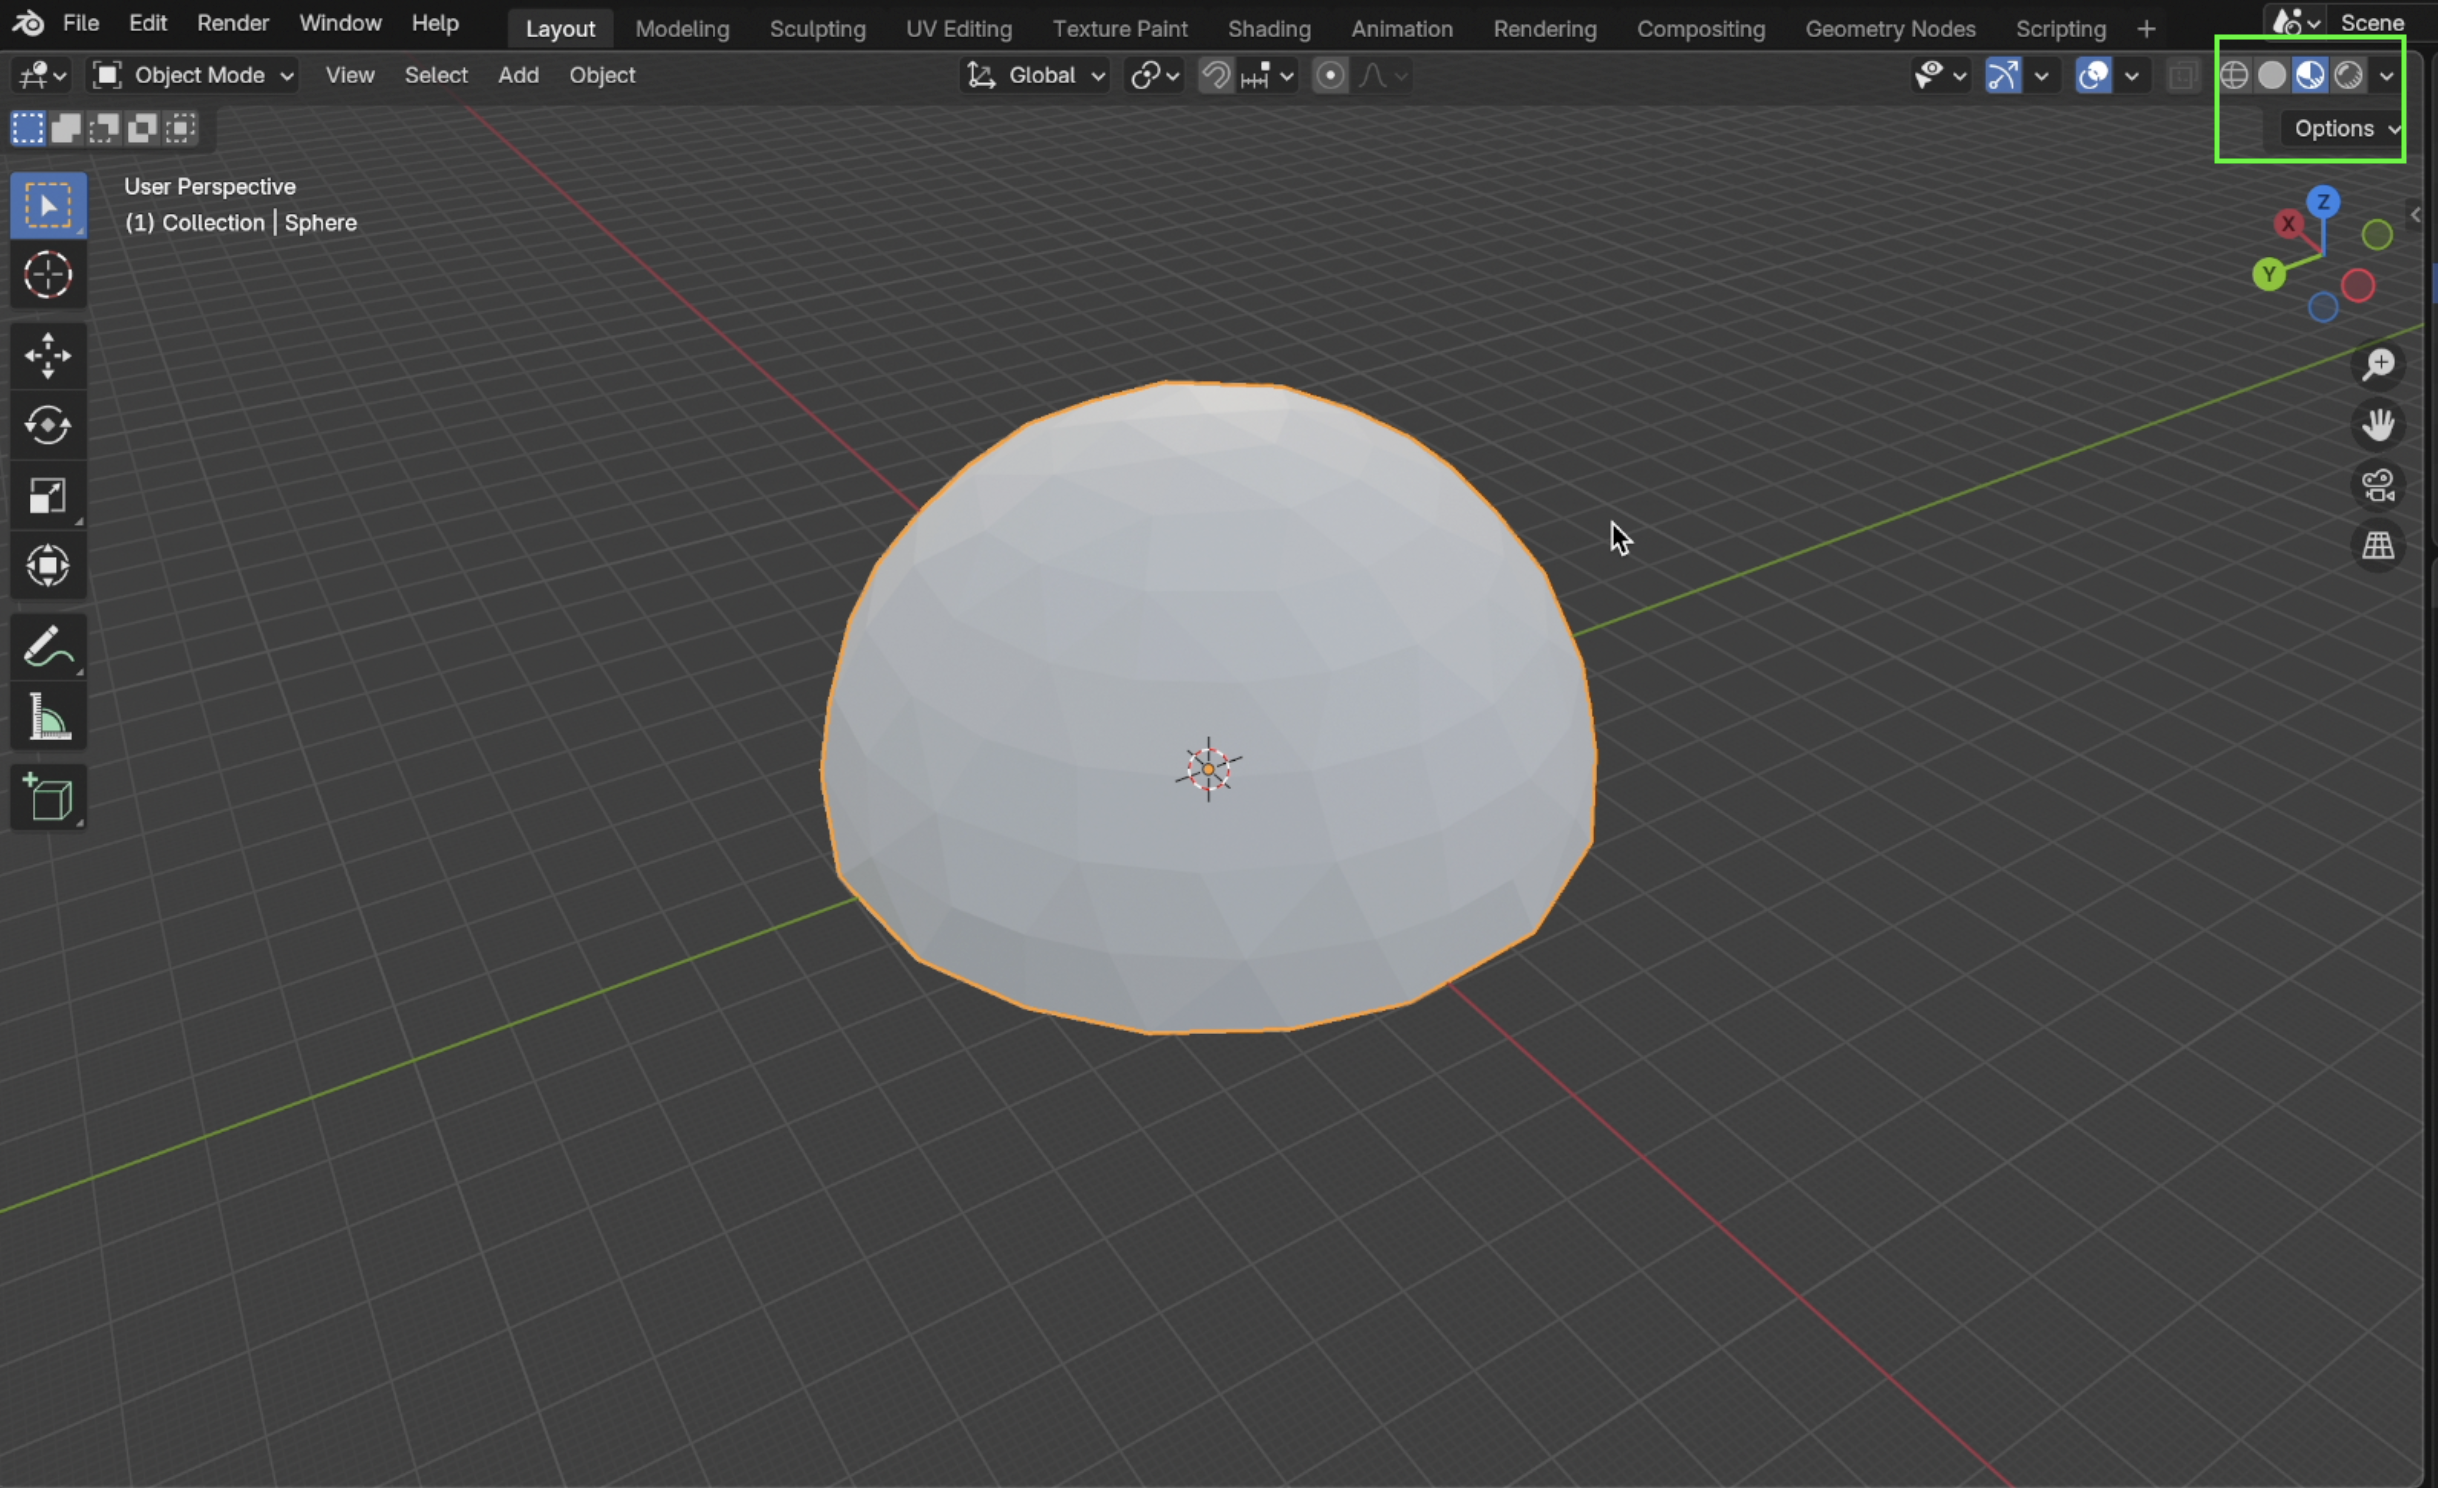
-
Switch to material viewport. To preview the material.
Step 10: Export as FBX

-
File → Export → FBX.
- Settings:
- Scale: 1.00
- Path Mode: : Auto
- Limit To: Selected Objects
N.B. Other defaults are fine.
- Save as
Skydome.fbx.
Now you have:
Skydome.fbxSkydome_BR.png
You now have a low-poly skydome FBX ready to use in Horizon Worlds.
Upload to Horizon World Editor Using the Web.

Step 1: Go to your account
Go to the web portal for your creator account Horizon World Creator assets page (login if you haven’t already.)

- Click → Import.
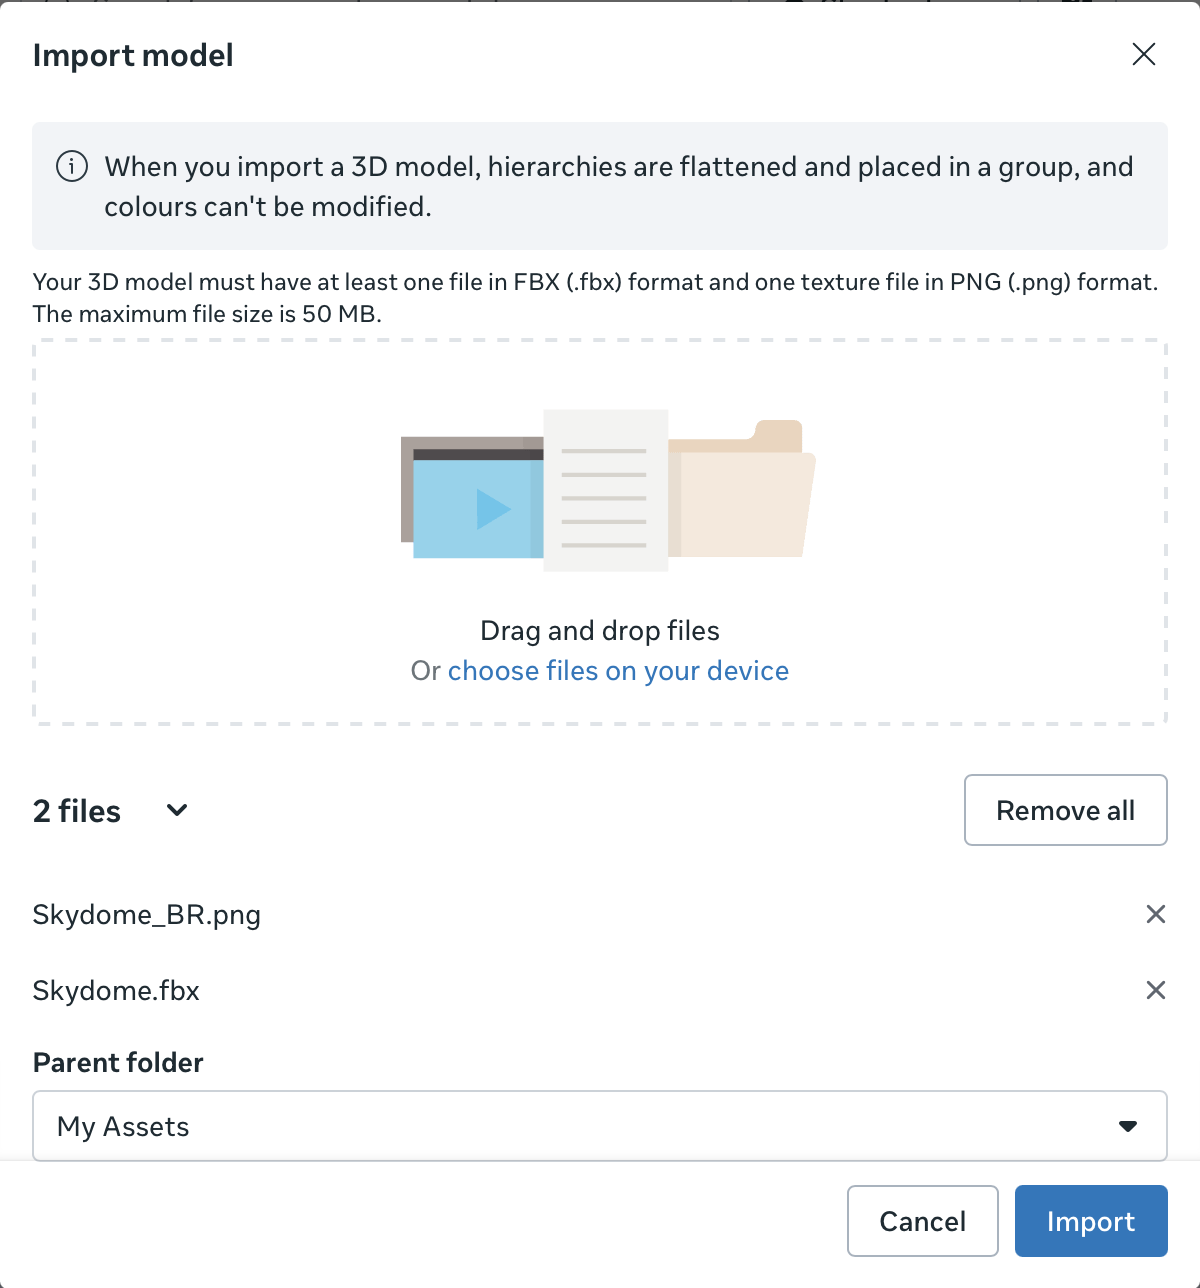
- Upload the two files:
- Skydome.fbx
- Skydome_BR.png
That’s it!
Create A Dynamic Sky in Horizon World
Dynamic Skydome System
The next part of this tutorial shows how to set up the Dynamic Skydome in Horizon Worlds, using the skydome and a dynamic sky controller script.
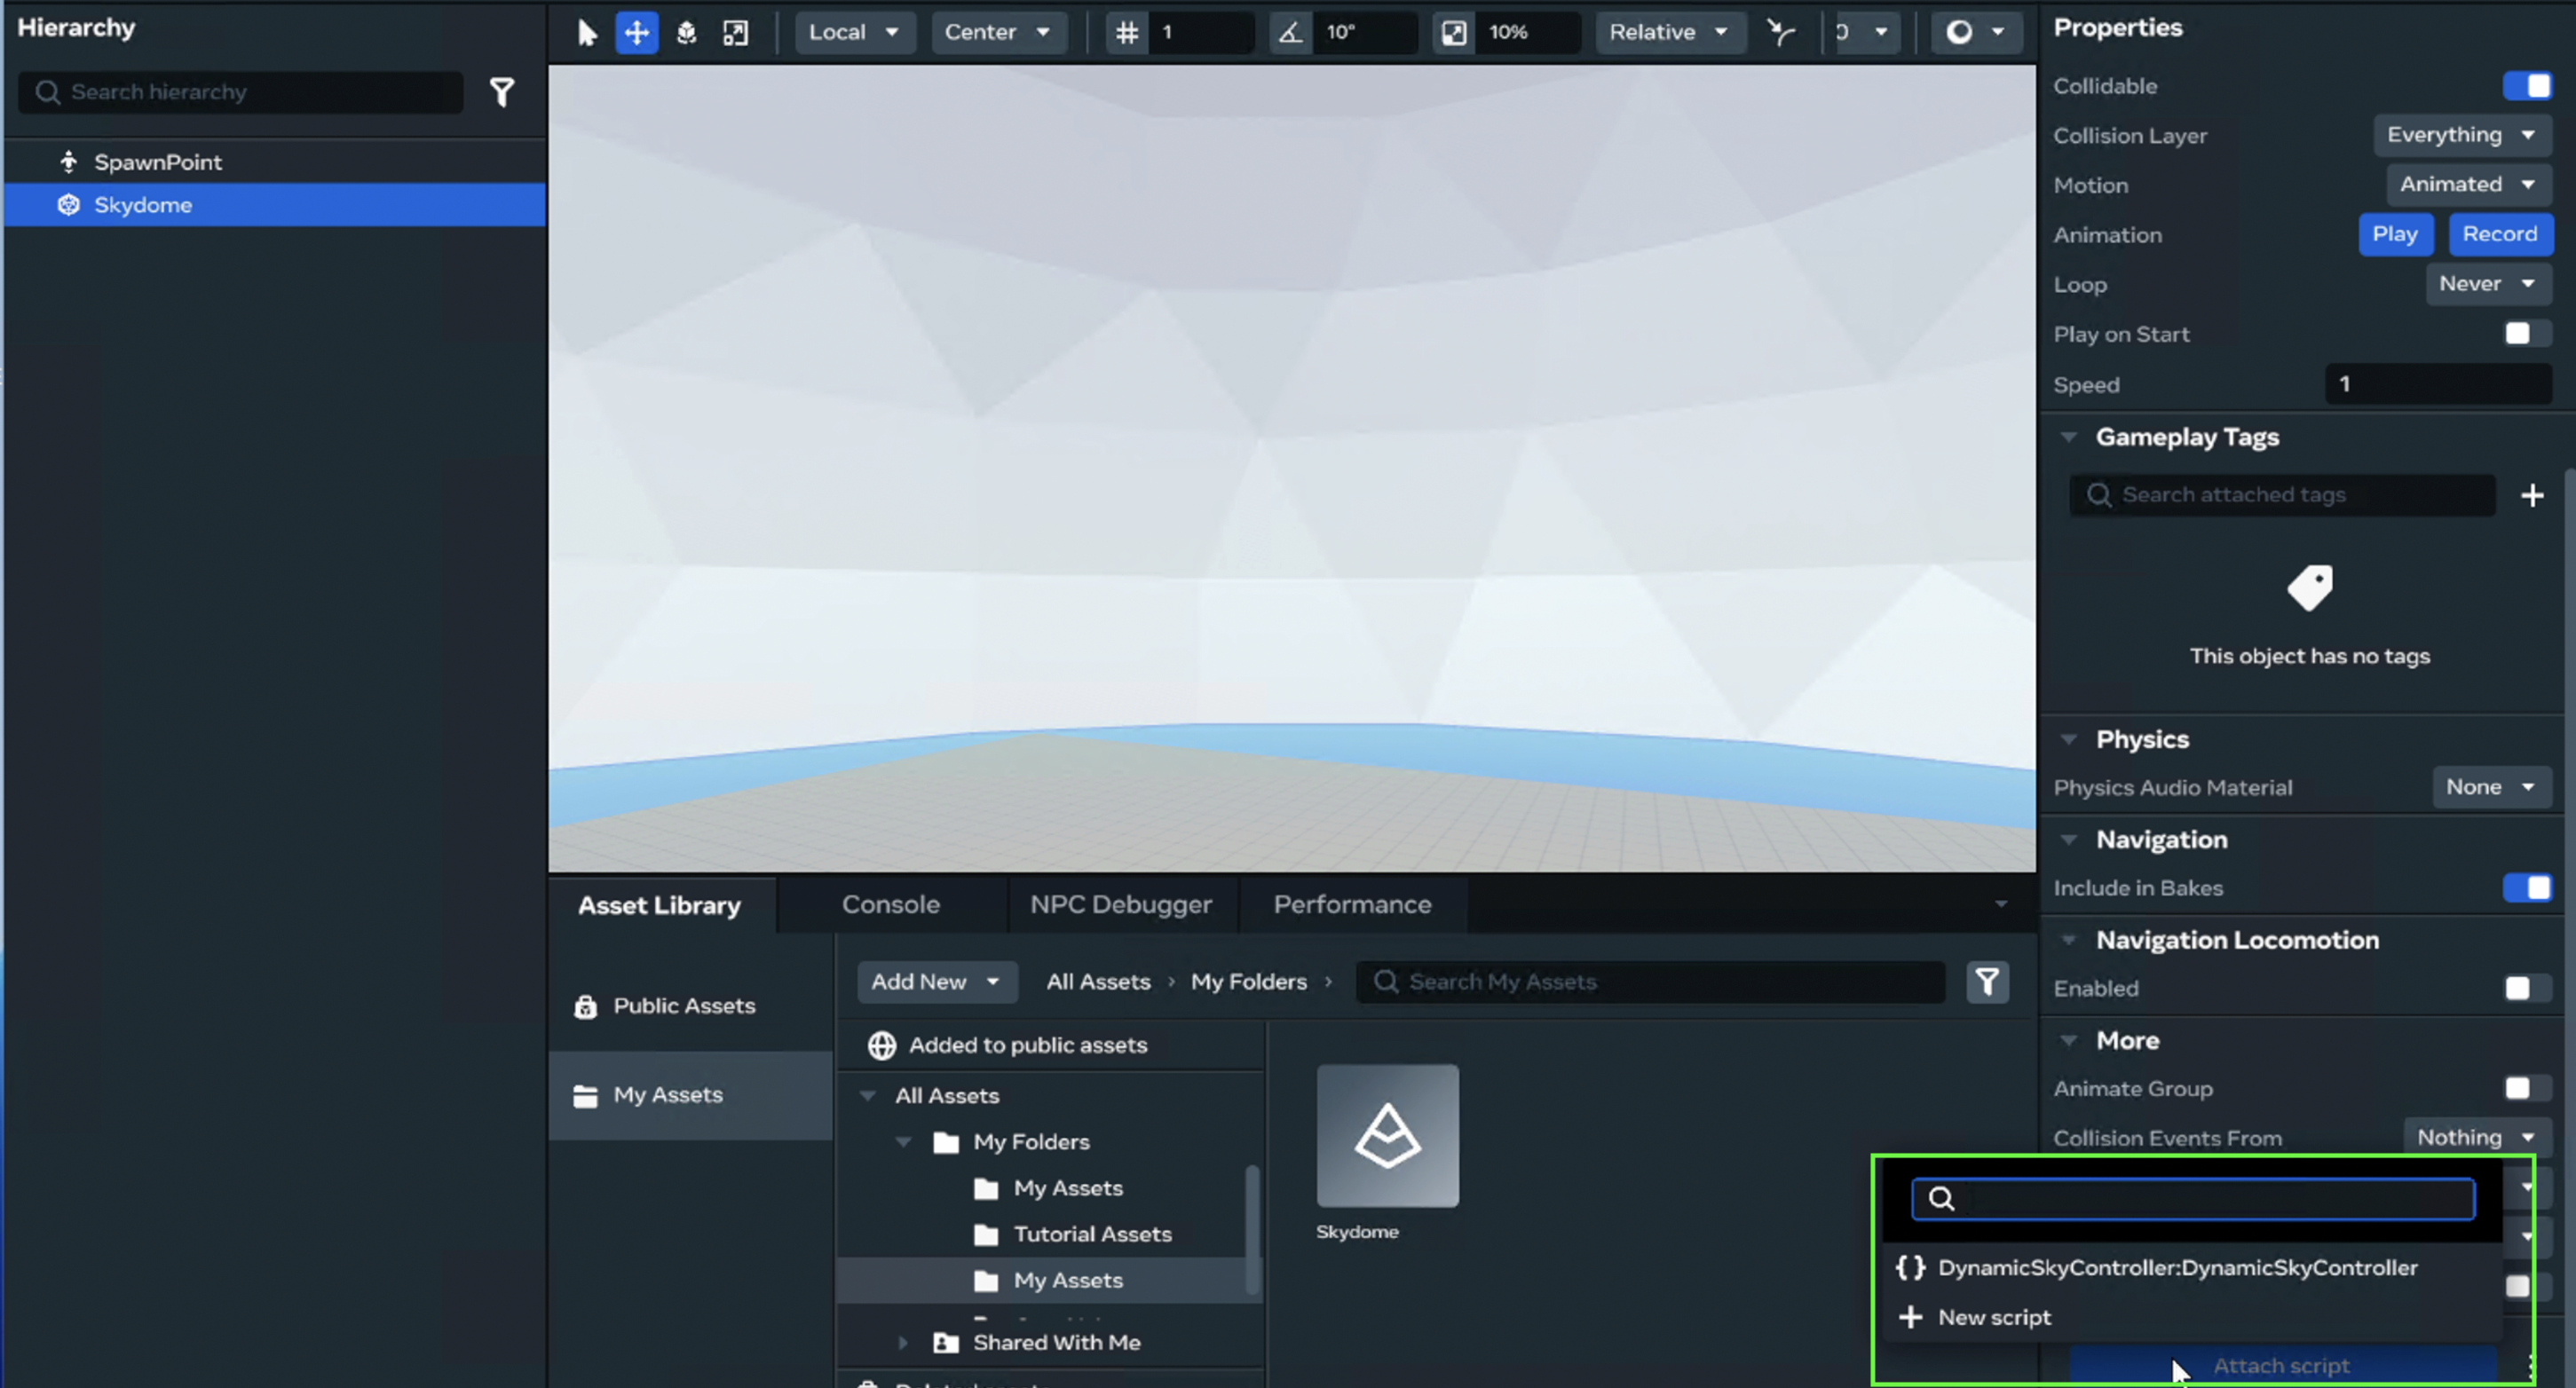
Step 1: Place skydome in the world
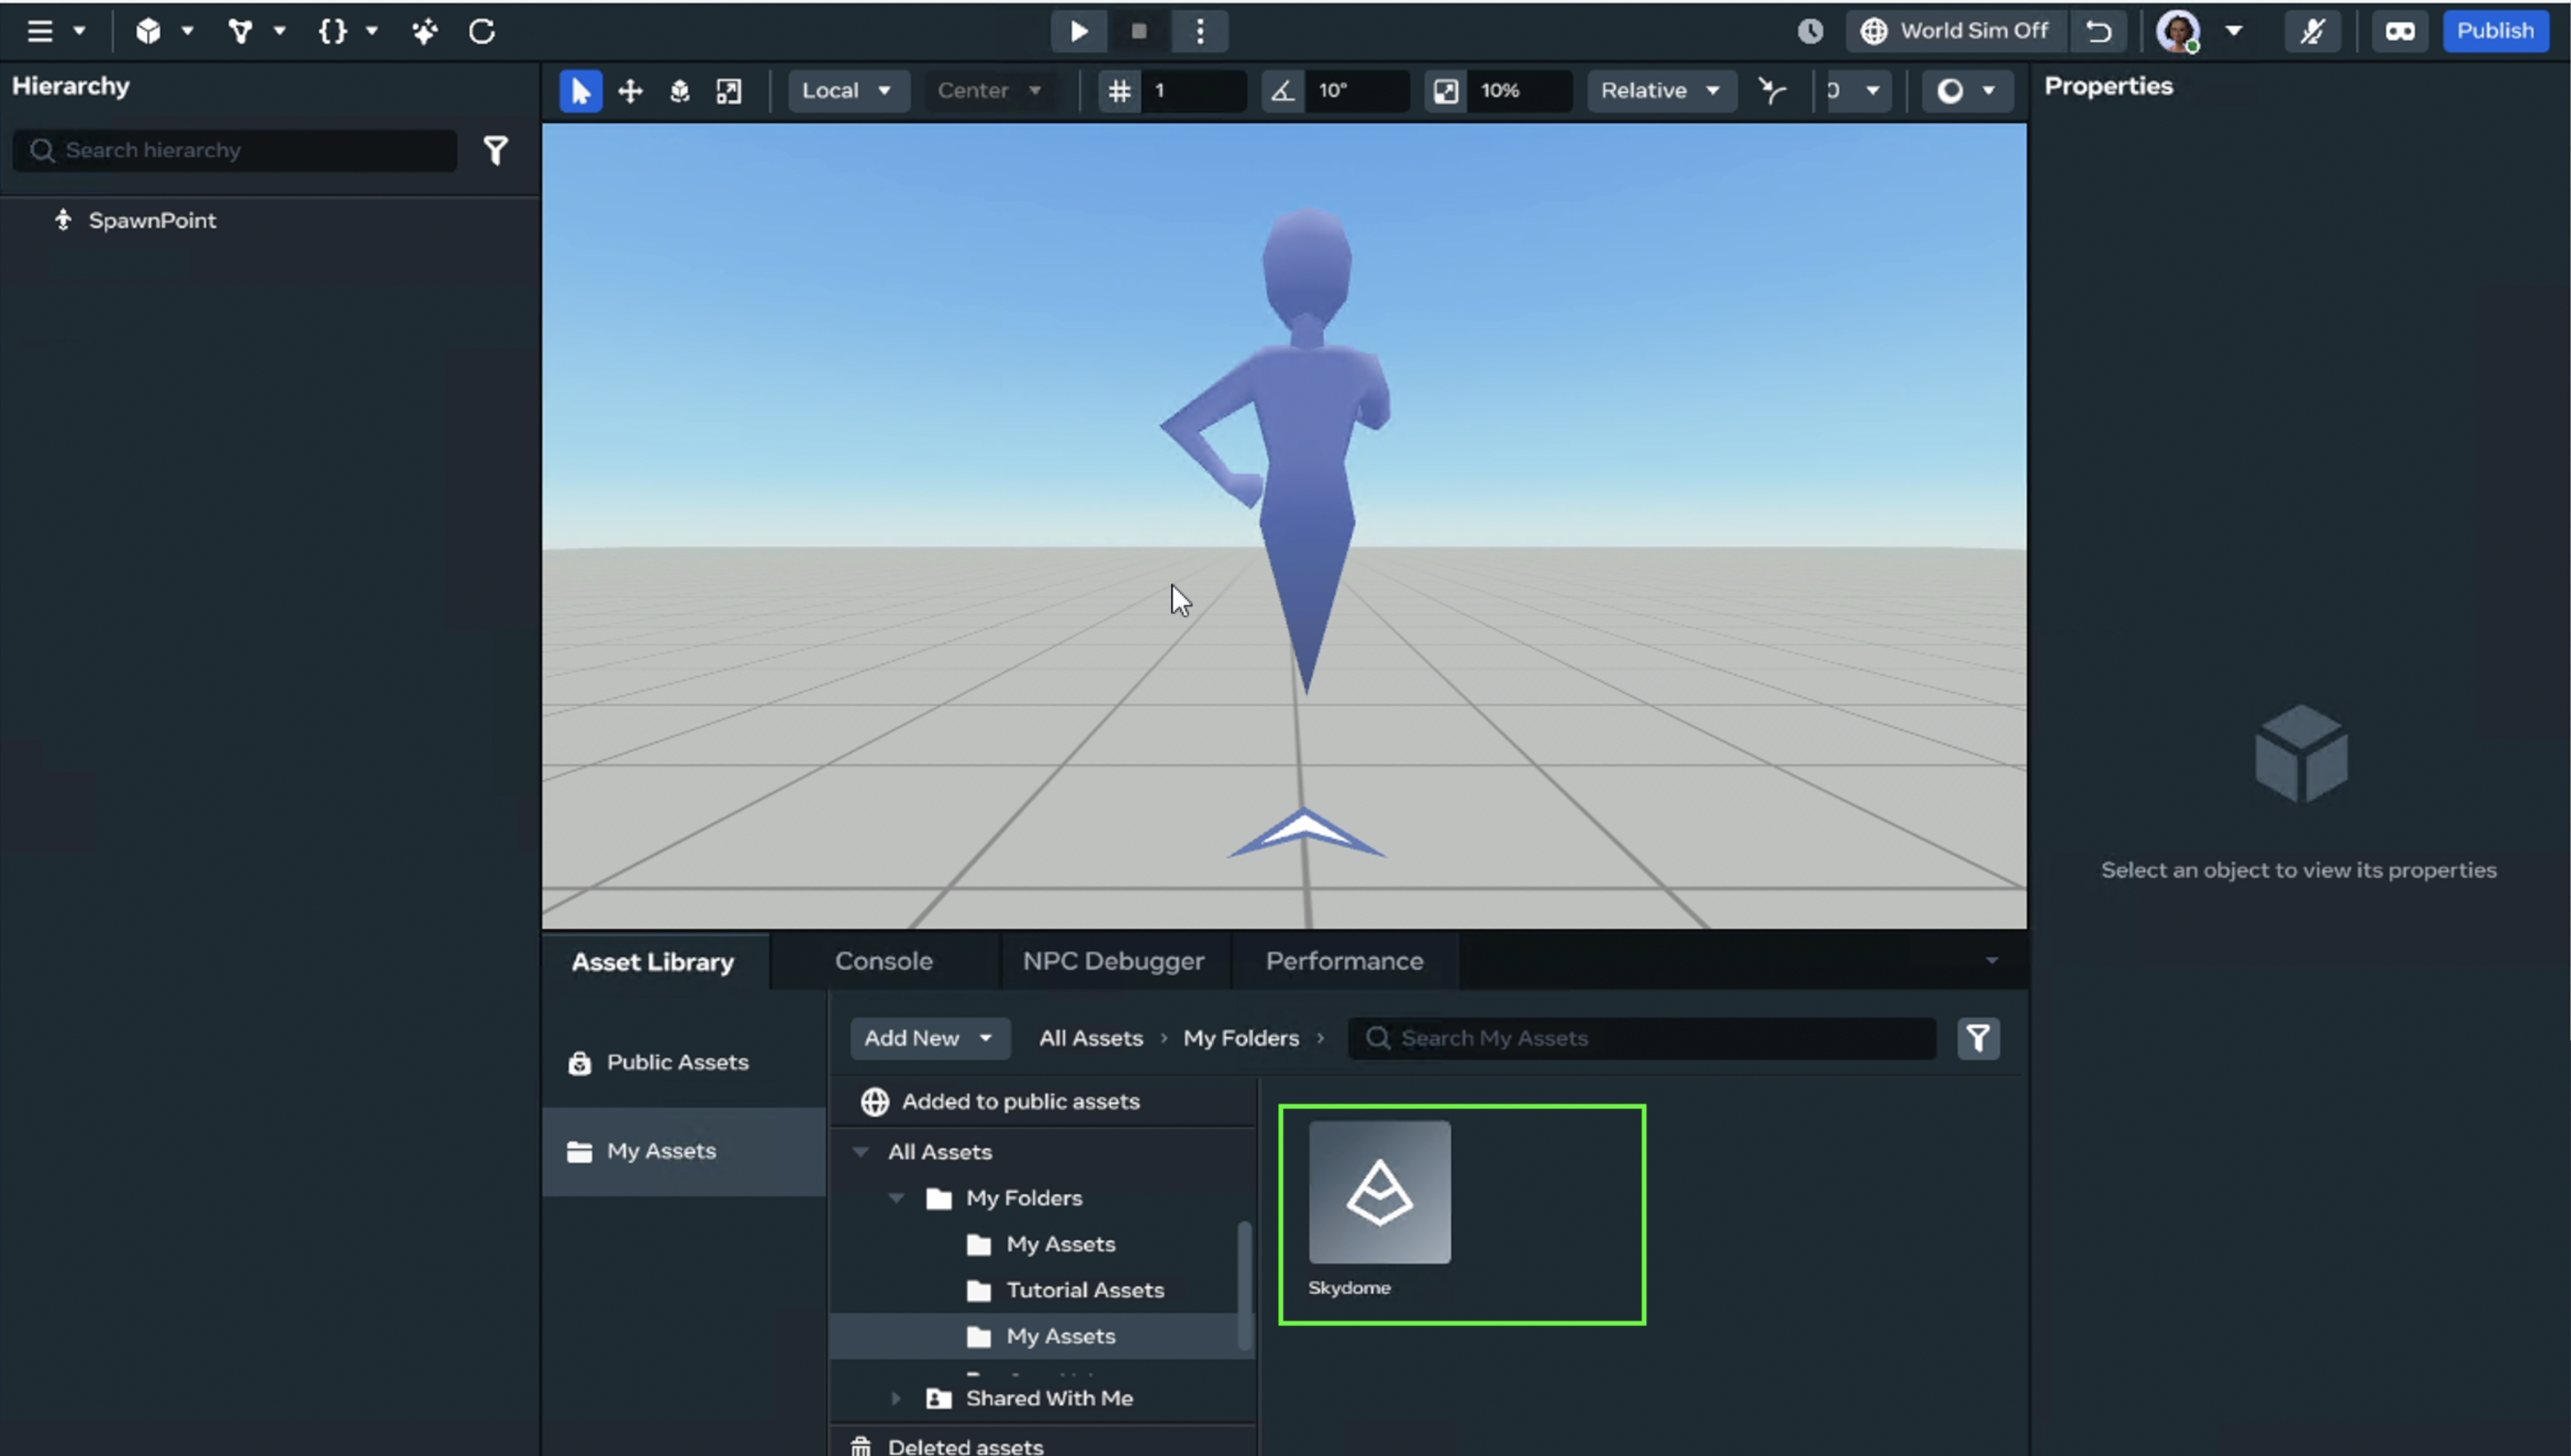
- Drag or Right click and place the dome in the world. (you should see the skydome model referenced in the Hierarchy)

- Press F to zoom out and see the skydome. Move the skydome’s position property, if it is too high.
That’s it. It’s time to Code!
Step 2: Dynamic Controller Script
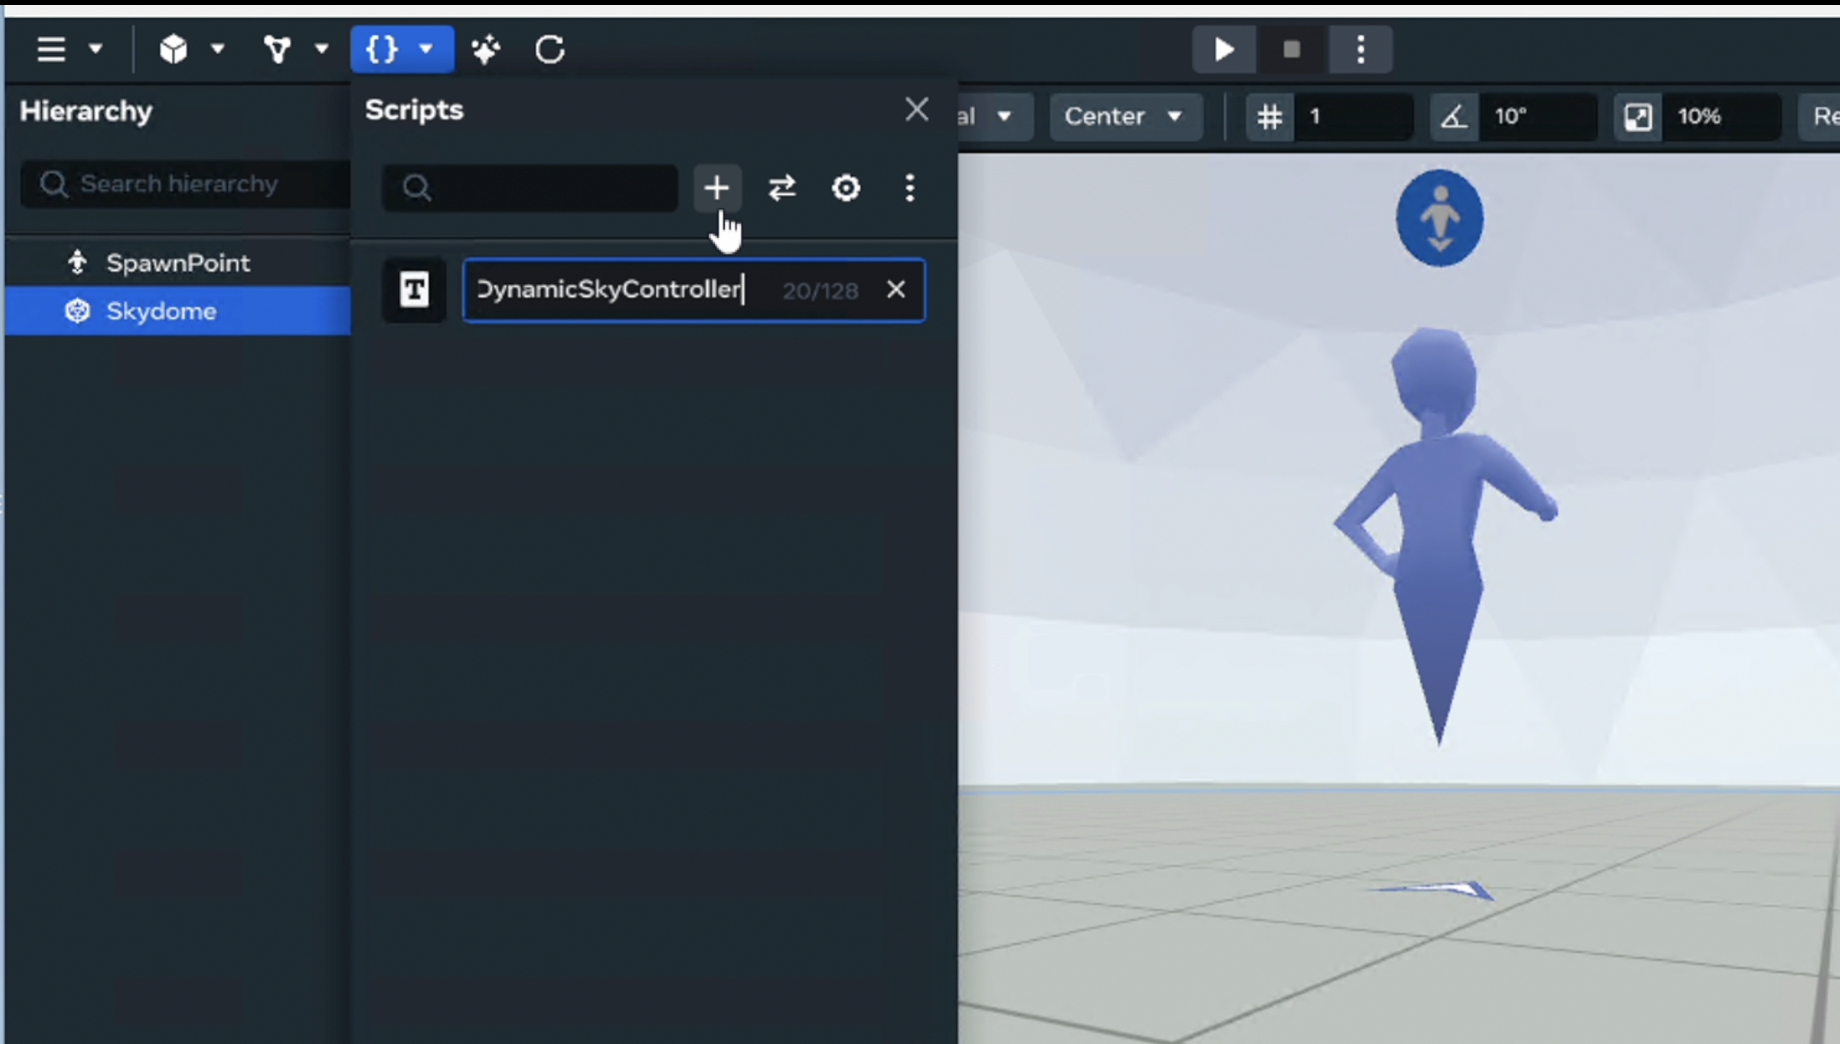
Create a Dynamic Sky Controller script that:
- Tracks current sky (
0–3) from an array of colours. - Shows only the correct colour.
- Fires a timed event when the colour changes.
- Attach script to the skydome.
- Double click the
DynamicSkyControllerscript to open in your Code Editor.
Step 3:
In your code editor:
It opens the new class attached to the Skydome entity.
import * as hz from 'horizon/core';

class DynamicSkyController extends hz.Component<typeof DynamicSkyController> {
 static propsDefinition = {};

  start() {  }

   }
hz.Component.register(DynamicSkyController);
Let’s think about what the code needs to do. The code needs to do three things:
- Create colours.
- Change skydome with colours.
- Change skydome colour at a random time.
At the top of the DynamicSkyController class.
Add:
//Sky Colours
private skyColours = [ new hz.Color(1,0,1), //Red
   new hz.Color(0,1,0),//Green
    new hz.Color(0,0,1), //Blue
     new hz.Color(1,1,0), //Yellow
     ]
- Create an array of colours.
N.B. You can add as many colours as you want or different colours. It’s up to you!
Add:
private currentSkyNumber = 0;
- A number property to access the colours in the array.
Add:
start() {
 const selectedColour = this.skyColours[this.currentSkyNumber];
}
- Create a const colour variable from one of the colours in the array.
Add:
start() {
 const selectedColour = this.skyColours[this.currentSkyNumber];
//Access the mesh property of this entity And change tint colour
  const skyMesh = this.entity.as(hz.MeshEntity);
   skyMesh.style.tintColor.set(selectedColour);
   skyMesh.style.tintStrength.set(1);
}
- Access the mesh of the entity (Skydome) by casting it as MeshEntity and access the tintColor property of this entity. Set it to change with selectedColour.
Test the skydome change effect.
- ctrl + S to save and return to the editor.
- Press play in Build mode.
- Check the Skydome has changed colour. It should be red if your currentSkyNumber is set to 0:
Add:
start() {
this.applySkyTint();
  }

//change skydome
  private applySkyTint()
  {
 const selectedColour = this.skyColours[this.currentSkyNumber];
//Access the mesh property of this entity And change tint colour
  const skyMesh = this.entity.as(hz.MeshEntity);
   skyMesh.style.tintColor.set(selectedColour);
   skyMesh.style.tintStrength.set(1);
}
- The code needs to run more than once. Let’s create a new function to do this.
-
Create a function called applySkyTint
-
Move the code from start into this function
-
In start call applySkyTint
-
Return to the world and test the dome changes.
Add:
start() {
   this.applySkyTint();
   this.scheduleNextSkyColour();
  }


//change colours randomly at a set time
  private scheduleNextSkyColour()
  {
   this.async.setTimeout(() => {
      this.currentSkyNumber = (this.currentSkyNumber + 1 ) % this.skyColours.length;
      this.applySkyTint();

    }, 3000);
  }
- Create a timing function
-
Create a function called scheduleNextSkyColour
-
It uses a timer set to 3 seconds (you can change this), to get a random number within the upper limit of the skyColours.length and calls the applySkyTint function.
-
In start call this scheduleNextSkyColour function.
-
Return to the world and test the dome changes.
-
It should change twice. Once from the applySkyTint function call and 3 seconds later change again from the scheduleNextSkyColour function.
Add:
//change colours randomly at a set time
  private scheduleNextSkyColour()
  {
   this.async.setTimeout(() => {
      this.currentSkyNumber = (this.currentSkyNumber + 1 ) % this.skyColours.length;
      this.applySkyTint();
      //new code
     this.scheduleNextSkyColour();
    }, 3000);
  }
- Call the function scheduleNextSkyColour within the method.
This allows the method to continuously run by calling itself from within the function.
Summary
- Created and optimised a low-poly skydome in Blender.
- Baked a flat colour texture into a PNG for compatibility.
- Exported a ready-to-use FBX with embedded textures for Horizon Worlds.
-
Created a skydome entity with colour variations using the skydome’s controller script.
Helper Links to Learn More: https://developers.meta.com/horizon-worlds/reference/2.0.0/core_meshentity
Thanks for reading, I hope you find this tutorial useful. Comments are welcome as I am learning too!
Happy Building!
Full script:
import * as hz from 'horizon/core';

class DynamicSkyController extends hz.Component<typeof DynamicSkyController> {
  static propsDefinition = {};
//Tasks
//Create Colours
//Change skydome with colours
//Change colours randomly at a set time

//Sky Colours
private skyColours = [ new hz.Color(1,0,1), //Red
   new hz.Color(0,1,0),//Green
   new hz.Color(0,0,1), //Blue
   new hz.Color(1,1,0), //Yellow
     ]
private currentSkyNumber = 0;

  start() {
   this.scheduleNextSkyColour();
  }

  //change skydome
  private applySkyTint()
  {
   const selectedColour = this.skyColours[this.currentSkyNumber];
   const skyMesh = this.entity.as(hz.MeshEntity);
   skyMesh.style.tintColor.set(selectedColour);
   skyMesh.style.tintStrength.set(1);
  }

  //change colours randomly at a set time
  private scheduleNextSkyColour()
  {
    this.async.setTimeout(() => {
      this.currentSkyNumber = (this.currentSkyNumber + 1 ) % this.skyColours.length;
      this.applySkyTint();
      this.scheduleNextSkyColour();
    }, 3000);
  }
}
hz.Component.register(DynamicSkyController);